So yesterday officially marked the beginning of my summer holiday!☀️ Without a doubt, the past few months in the pandemic have been tough for many of us in the country and at work, so I got to say I am very grateful to be able to take a break from it all for the moment.
It was an odd week for me especially to be finally reunited with all my colleagues at work. It does make me realise technology can never replace the valuable times one may have in the company of the people we love.❤️ A handshake and a hug can never be replaced easily. (And I was certainly happy that my colleagues didn’t say no to me bringing a cake in!😬 All rest assured that hygiene was maintained!) Farewells may be difficult to begin with, but one must journey on and remember all the good times.
Meanwhile, I am now packing to get ready for my 4-day road trip tomorrow. Obviously it’s been quite a while since I last travelled. While I am telling myself to be extra cautious in the journeys ahead, I am very excited to be out of the city again! Stay tune for the updates! 😉
Sometimes, it’s a bit odd finding yourself somehow doing the same thing again without meaning to, right? 😂
In the past months of lockdown, a lot of people have been baking/ cooking up a storm on social media! 👨🍳👩🍳 And one thing that frequently keeps popping up was focaccia. (Yum!😋) Honestly, the focaccia I’ve been seeing all look so amazing, I was so inspired to make my own! One of my fellow bakers on Instagram has decided to have a bake-along with focaccia this week, and I took the opportunity to also make my own! 💪 Coincidentally, I also happened to be making focaccia this time last year! 😂 (I used the same dough recipe too so you can check it out here 👉 https://tangosbaking.home.blog/2019/05/31/red-orange-yellow-green-and/)
I went with a garden-theme, having really been inspired by the sunny weather these past days. ☀️💐🌺🌸🌼🌿 Such a shame I will be avoiding parks and beaches for the time being though, but I am really looking forward to things being back to normal soon again. Beside life in pandemic, it seems the world is very much the same, so let’s look after it. 😊🌎❤️
It’s VE Day today, and certainly given the current circumstances, I think everyone deserves to have a good, lazy, relaxing day. I did honestly feel a bit weird in the past week. Maybe I am being wore down or feeling uncertainty about the future? Sometimes, my mind can still racing and get a bit too ahead of itself, and I do tell myself to take it one day at a time when it happens. Ultimately, life still has a long way to go.
The weather has been increasingly hot, and certainly my small apartment has been feeling the heat lately! 😂🔥🔥 The warm weather does make me crave for some cool, fresh summer dessert. Last week for Lockdown Bake Club, I made this rainbow fruit meringue served with my homemade rainbow ice cream. Perfect for eating under the sun! ☀️☀️ A rainbow is a symbol of hope 🌈🌈 and there is no doubt in my mind that there is still so much to look forward to in the future! ❤️
Stay strong and safe! I wish everyone a happy long weekend! ☺️
Time really does fly when you’re having fun! Before long, my holiday is soon coming to an end and busy life will once again take over. It’s funny though that for my last weekend, I don’t feel as proactive in going outside as much as I thought I would, and rather I seem to prefer spending more time chilling at home. (Though it was great last night drinking with some old uni friends in Soho and then wandered into a late-night restaurant in Chinatown whilst tipsy. 😂😂)
With work looming around the corner, I have been trying my best to put the stress at the back of my mind by doing what I love most– and that’s baking of course! If you had somehow read my posts earlier this month, you would see that I went on a bread-making spree. Continuing this, I decided to make ciabatta for the first time yesterday. I find that there is something very unique about bread that is very stress-relieving. Unlike cake and pastry, bread needs time to be good. Whilst the impatient side of me may sometimes find that unbearable, I also found that oddly relaxing. Sitting around and lying down whilst waiting for the bread to slowly prove and rise… it’s like telling me, ‘What’s the point of rushing in life? Let’s just take the time to savour every moment that comes along…’ And that’s what I am going to do now, it’s sit and relax, and enjoy the now. 🙂
This recipe is found in ‘How To Make Bread’ by Emmanuel Hadjiandreou. (I also added some dried herbs in it to spice things up! 😉)
Ciabatta
Quantity: 2 ciabatta
Ingredients:
200g / 1½ cups white strong/bread flour
4g / ¾ tsp salt
1g / ¼ tsp dried/active dry yeast
150g / ⅔ cup warm water
50g / 3 tbsp olive oil
Method:
1. Mix the flour and salt together in a large mixing bowl.
2. Dissolve the yeast in the warm water. Add to the flour mixture.
3. Mix the mixtures together with a wooden spoon to form a fairly sticky dough.
4. Place about one third of the olive oil in a separate mixing bowl. Transfer the dough over.
5. Cover and let the dough rest for 1 hour. After the 1 hour, gently fold the dough twice and cover again.
6. Repeat step 5 for three more times. Add a little olive oil before resting each time so that the dough does not stick too much to the bottom of the bowl. By the end, the dough should be well-risen and bubbly.
7. Transfer the dough to a floured surface. Be gentle to avoid damaging the air bubbles. Divide it into two equal portions.
8. Shape the dough into a rough, slipper shape. Roll in flour and place on a baking tray lined with baking parchment.
9. Let it rest for 5-10 minutes. Meanwhile, preheat the oven to 240C/475F/Gas 9.
10. Bake for about 15 minutes, or until golden brown and it makes a hollow sound when tapped at the bottom. (You do not need a cupful of water to create steam in the oven as the ciabatta dough is moist enough to create steam on its own.) When ready, set on a wire rack to cool.
As we are now firmly in the month of August, the warm weather here in the UK might be approaching to its end (now I might just have jinxed myself with the unpredictability of British weather lol.) With the scorching hot weather, I have completely lost count with the number of ice creams I had eaten in the past months. 😛🍦🍦🍦 But, have you ever tried to make your own ice cream at home? With homemade ice creams, you are free to create any flavours you can imagine and the sky is the limit!
Ice cream is essentially a flavoured, frozen custard, and it is actually a lot more straightforward and easy to make than one may think otherwise (at least in my case lol.) All you really need is a plastic box and a freezer, alongside some stirrings to do and a bit of patience. The first flavour I made is one of my absolute favourite – mango! 😋😋 You can check out my recipe below, and it is also adaptable for other ice cream flavours!
What is your favourite ice cream flavour? 😉
Mango Ice Cream
Ingredients:
300g single cream
100g caster sugar
350g mango puree
250g double cream
1 tbsp lemon juice
Method:
Heat single cream at a lot heat, the stir in sugar until it has completely dissolved.
Pour the cream in a container, then add in the mango puree, double cream and lemon juice. Mix using a whisk until well-combined.
Place the ice cream in the freezer for about 3 hours, or until semi-frozen. Use a fork to fold the ice cream evenly, starting from the edges.
Place it back to the freezer to freeze overnight, or until it is completely frozen before serving.
After a day of being back home, I started again looking through the photos on my phone from my trip in Paris. I then realised there were many snapshots of brief, funny and cultural moments that made my time there the more special and exciting. So, here are 10 unseen bits from my Parisian adventure. 😉
1. We were never short on water
While I was worried about dehydration, many people used the hot weather to business advantages by setting up nearby long queues around attractions and sell ice cold bottled waters on the spot. (Quite honestly though, I probably won’t have made it through those 4.5 hours by the Catacombs without them. 😂 Though I thought they did bump up the price to €2 there…🤔)
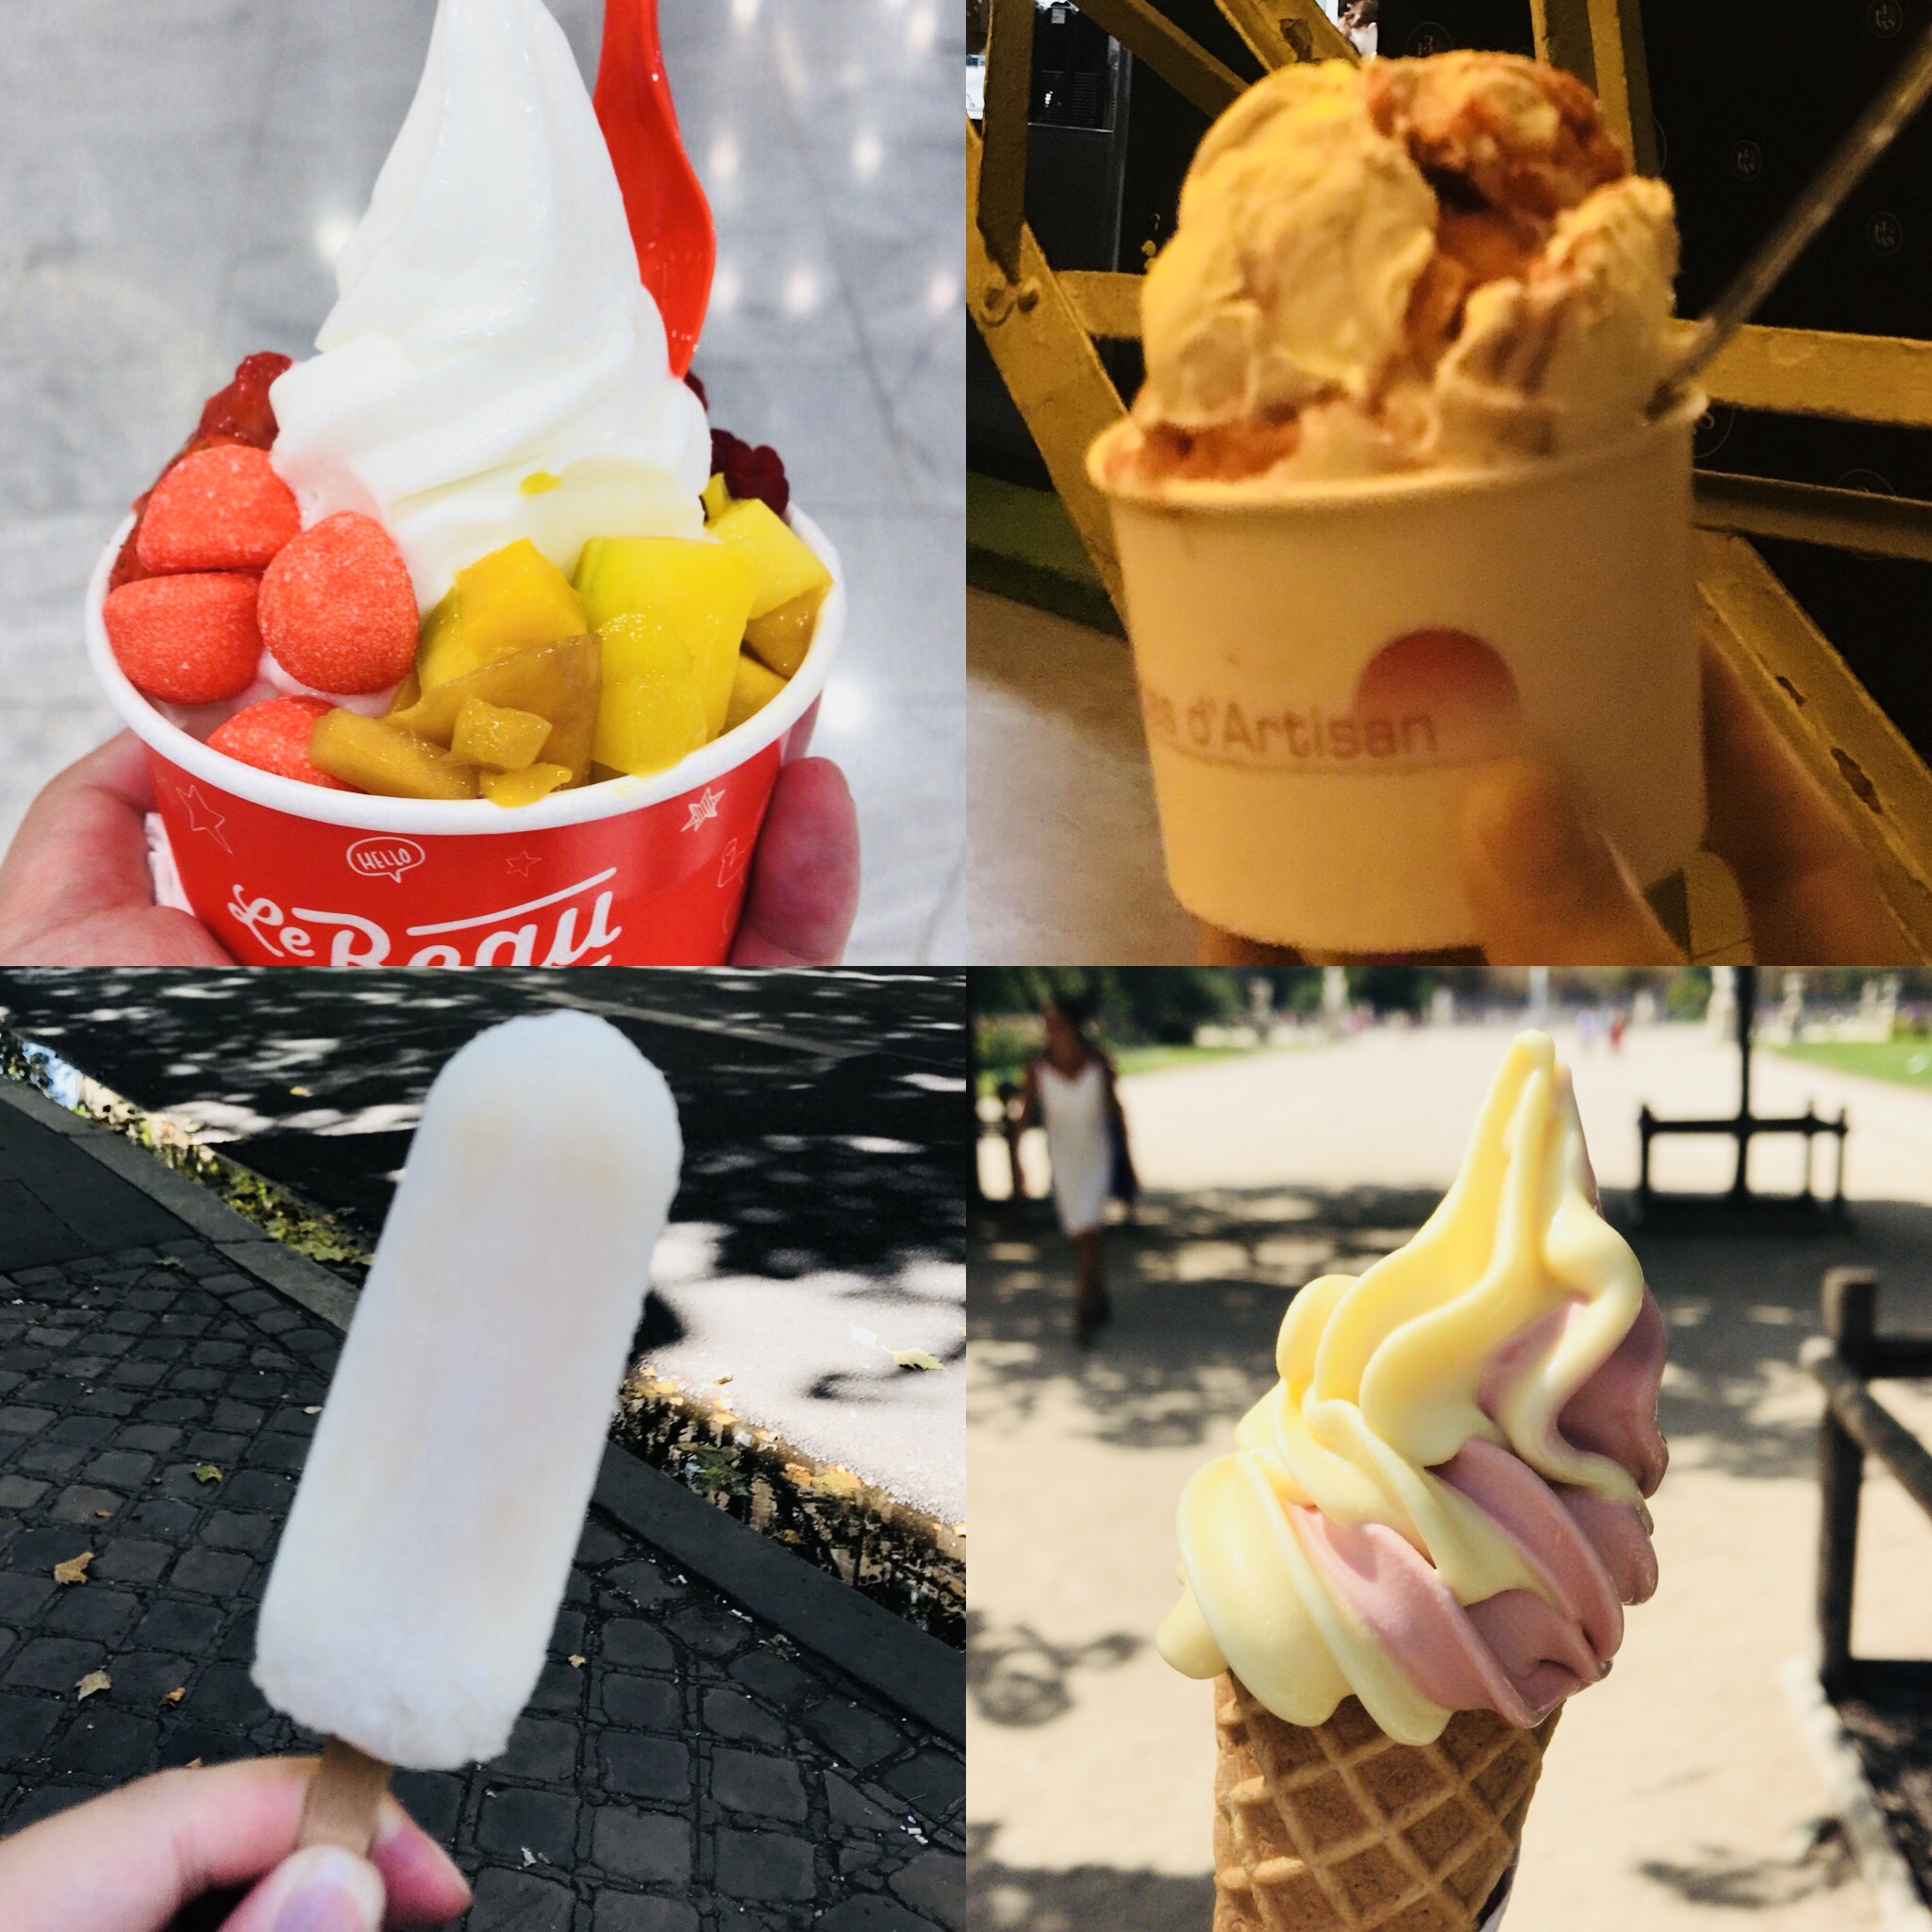
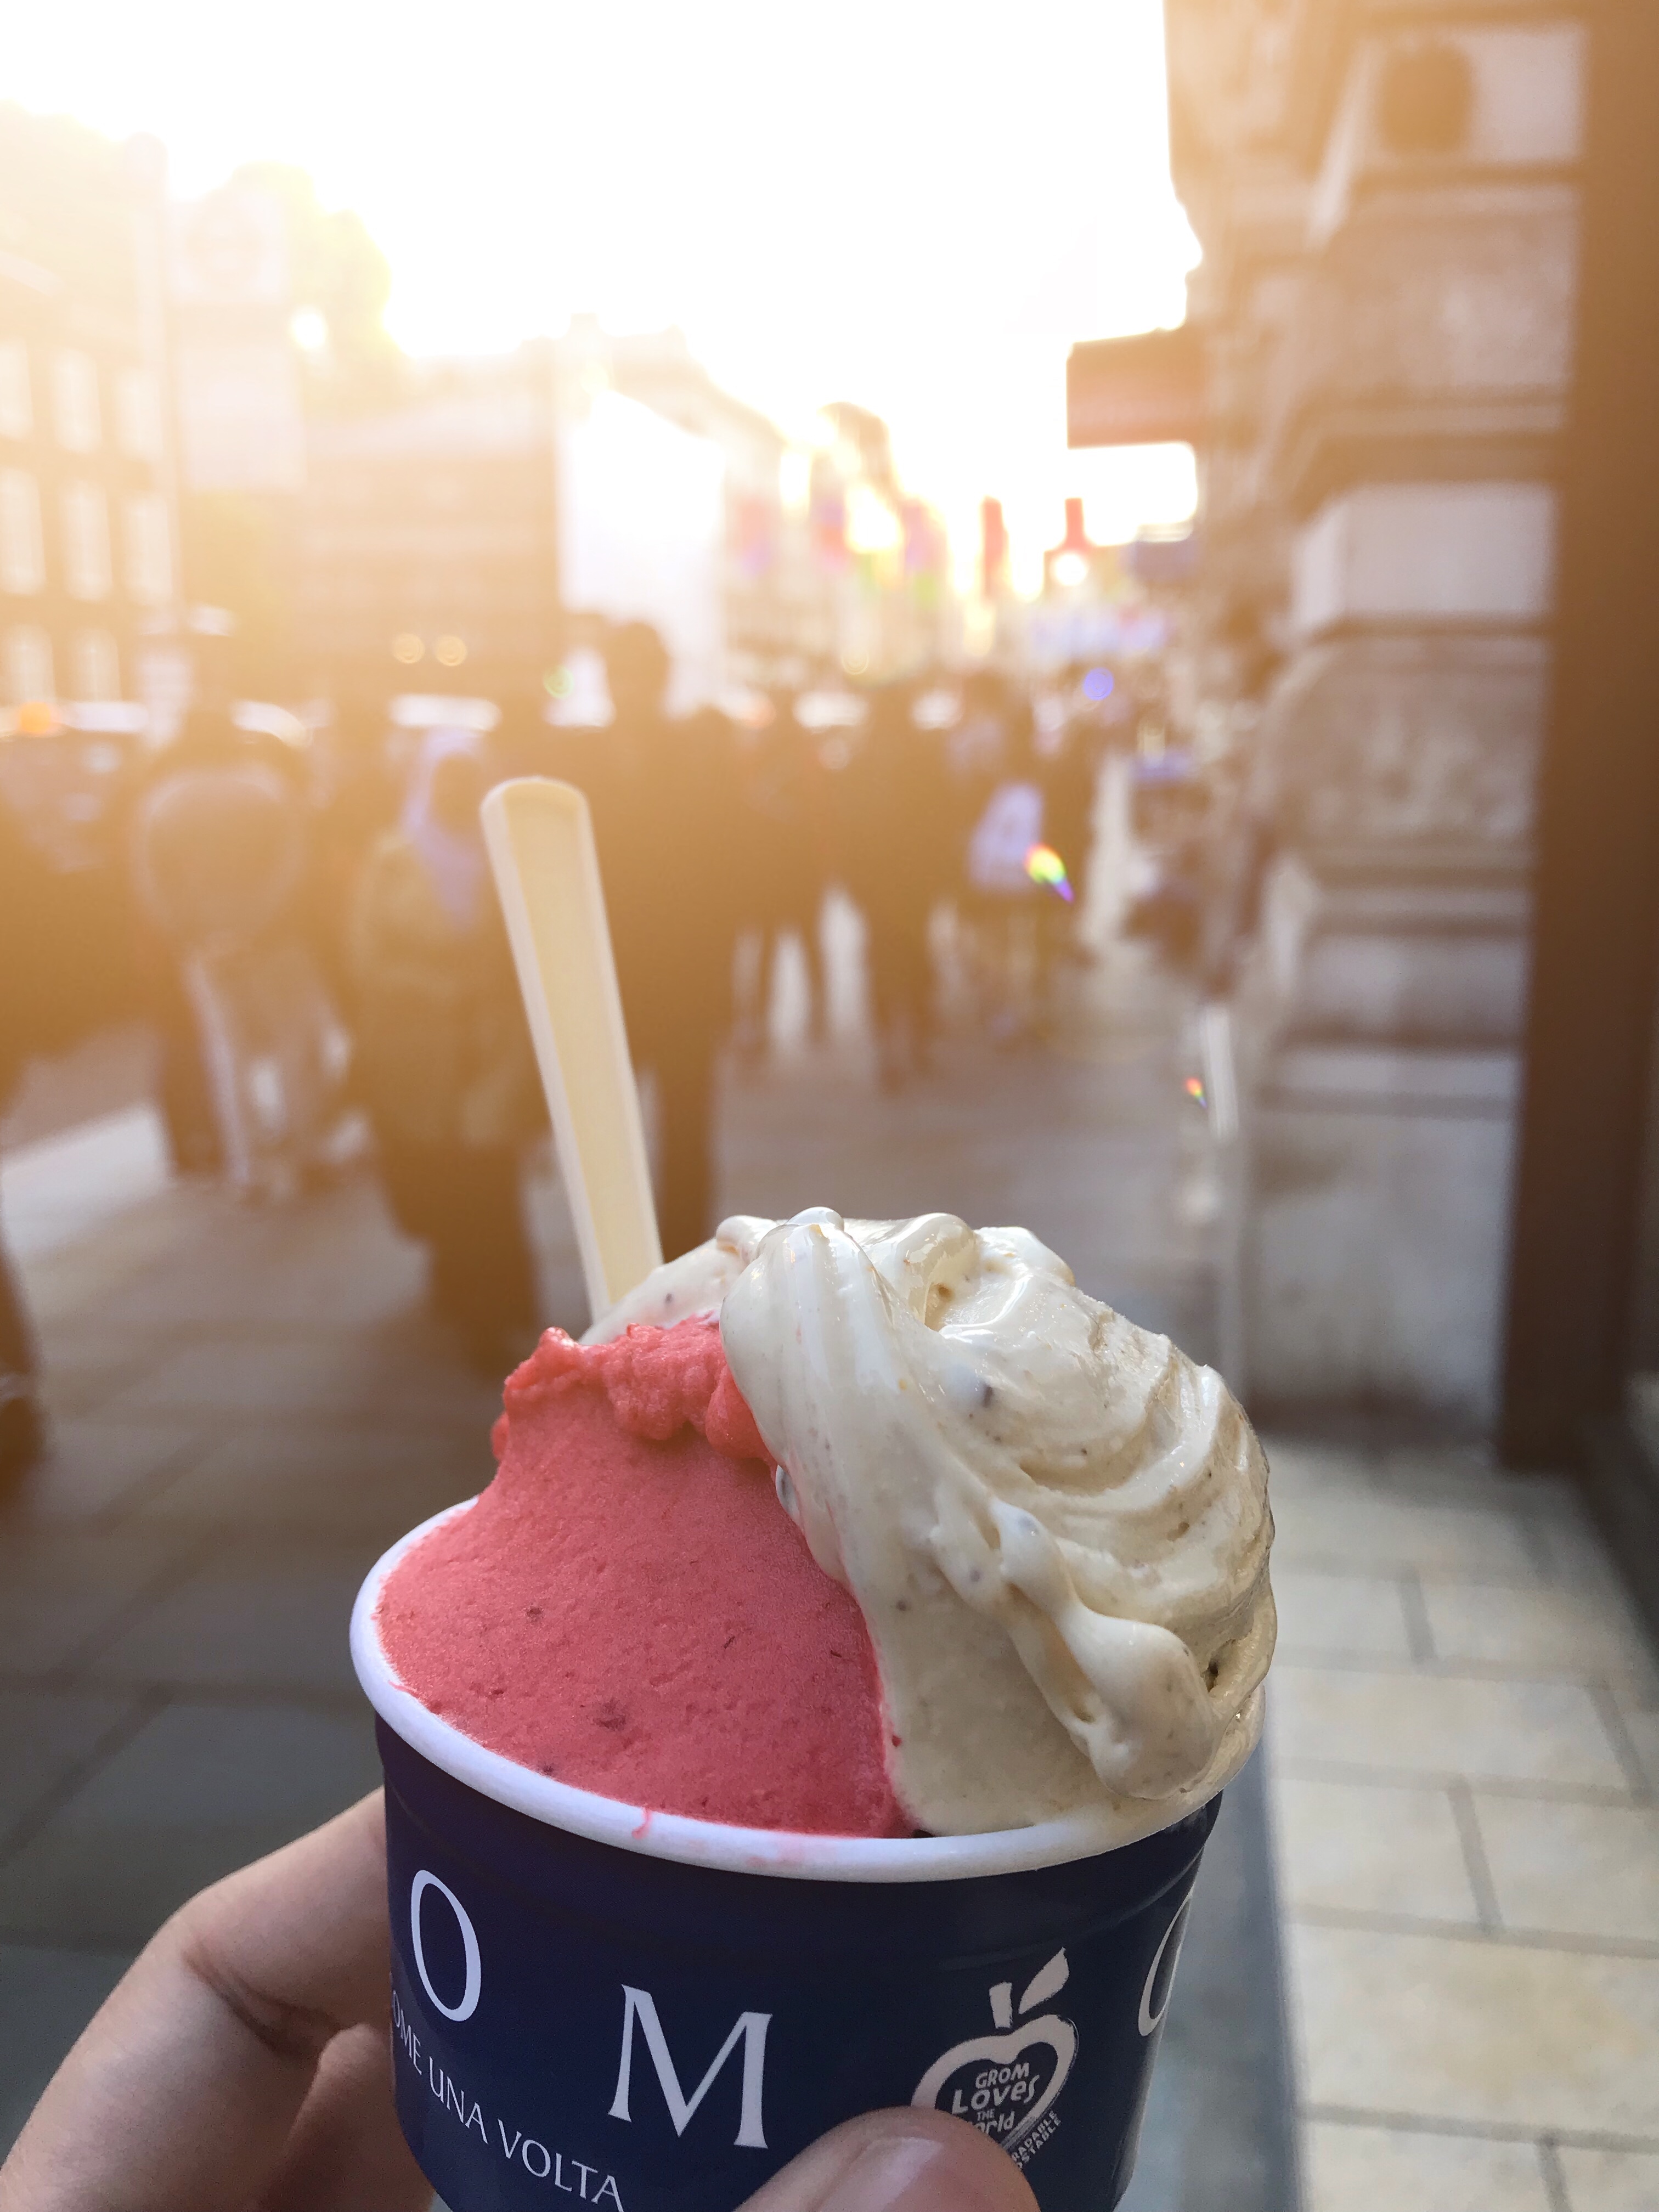
2. Ice cream is your new best friend
On the subject of the hot weather, ice creams had become my staple diet… 😂
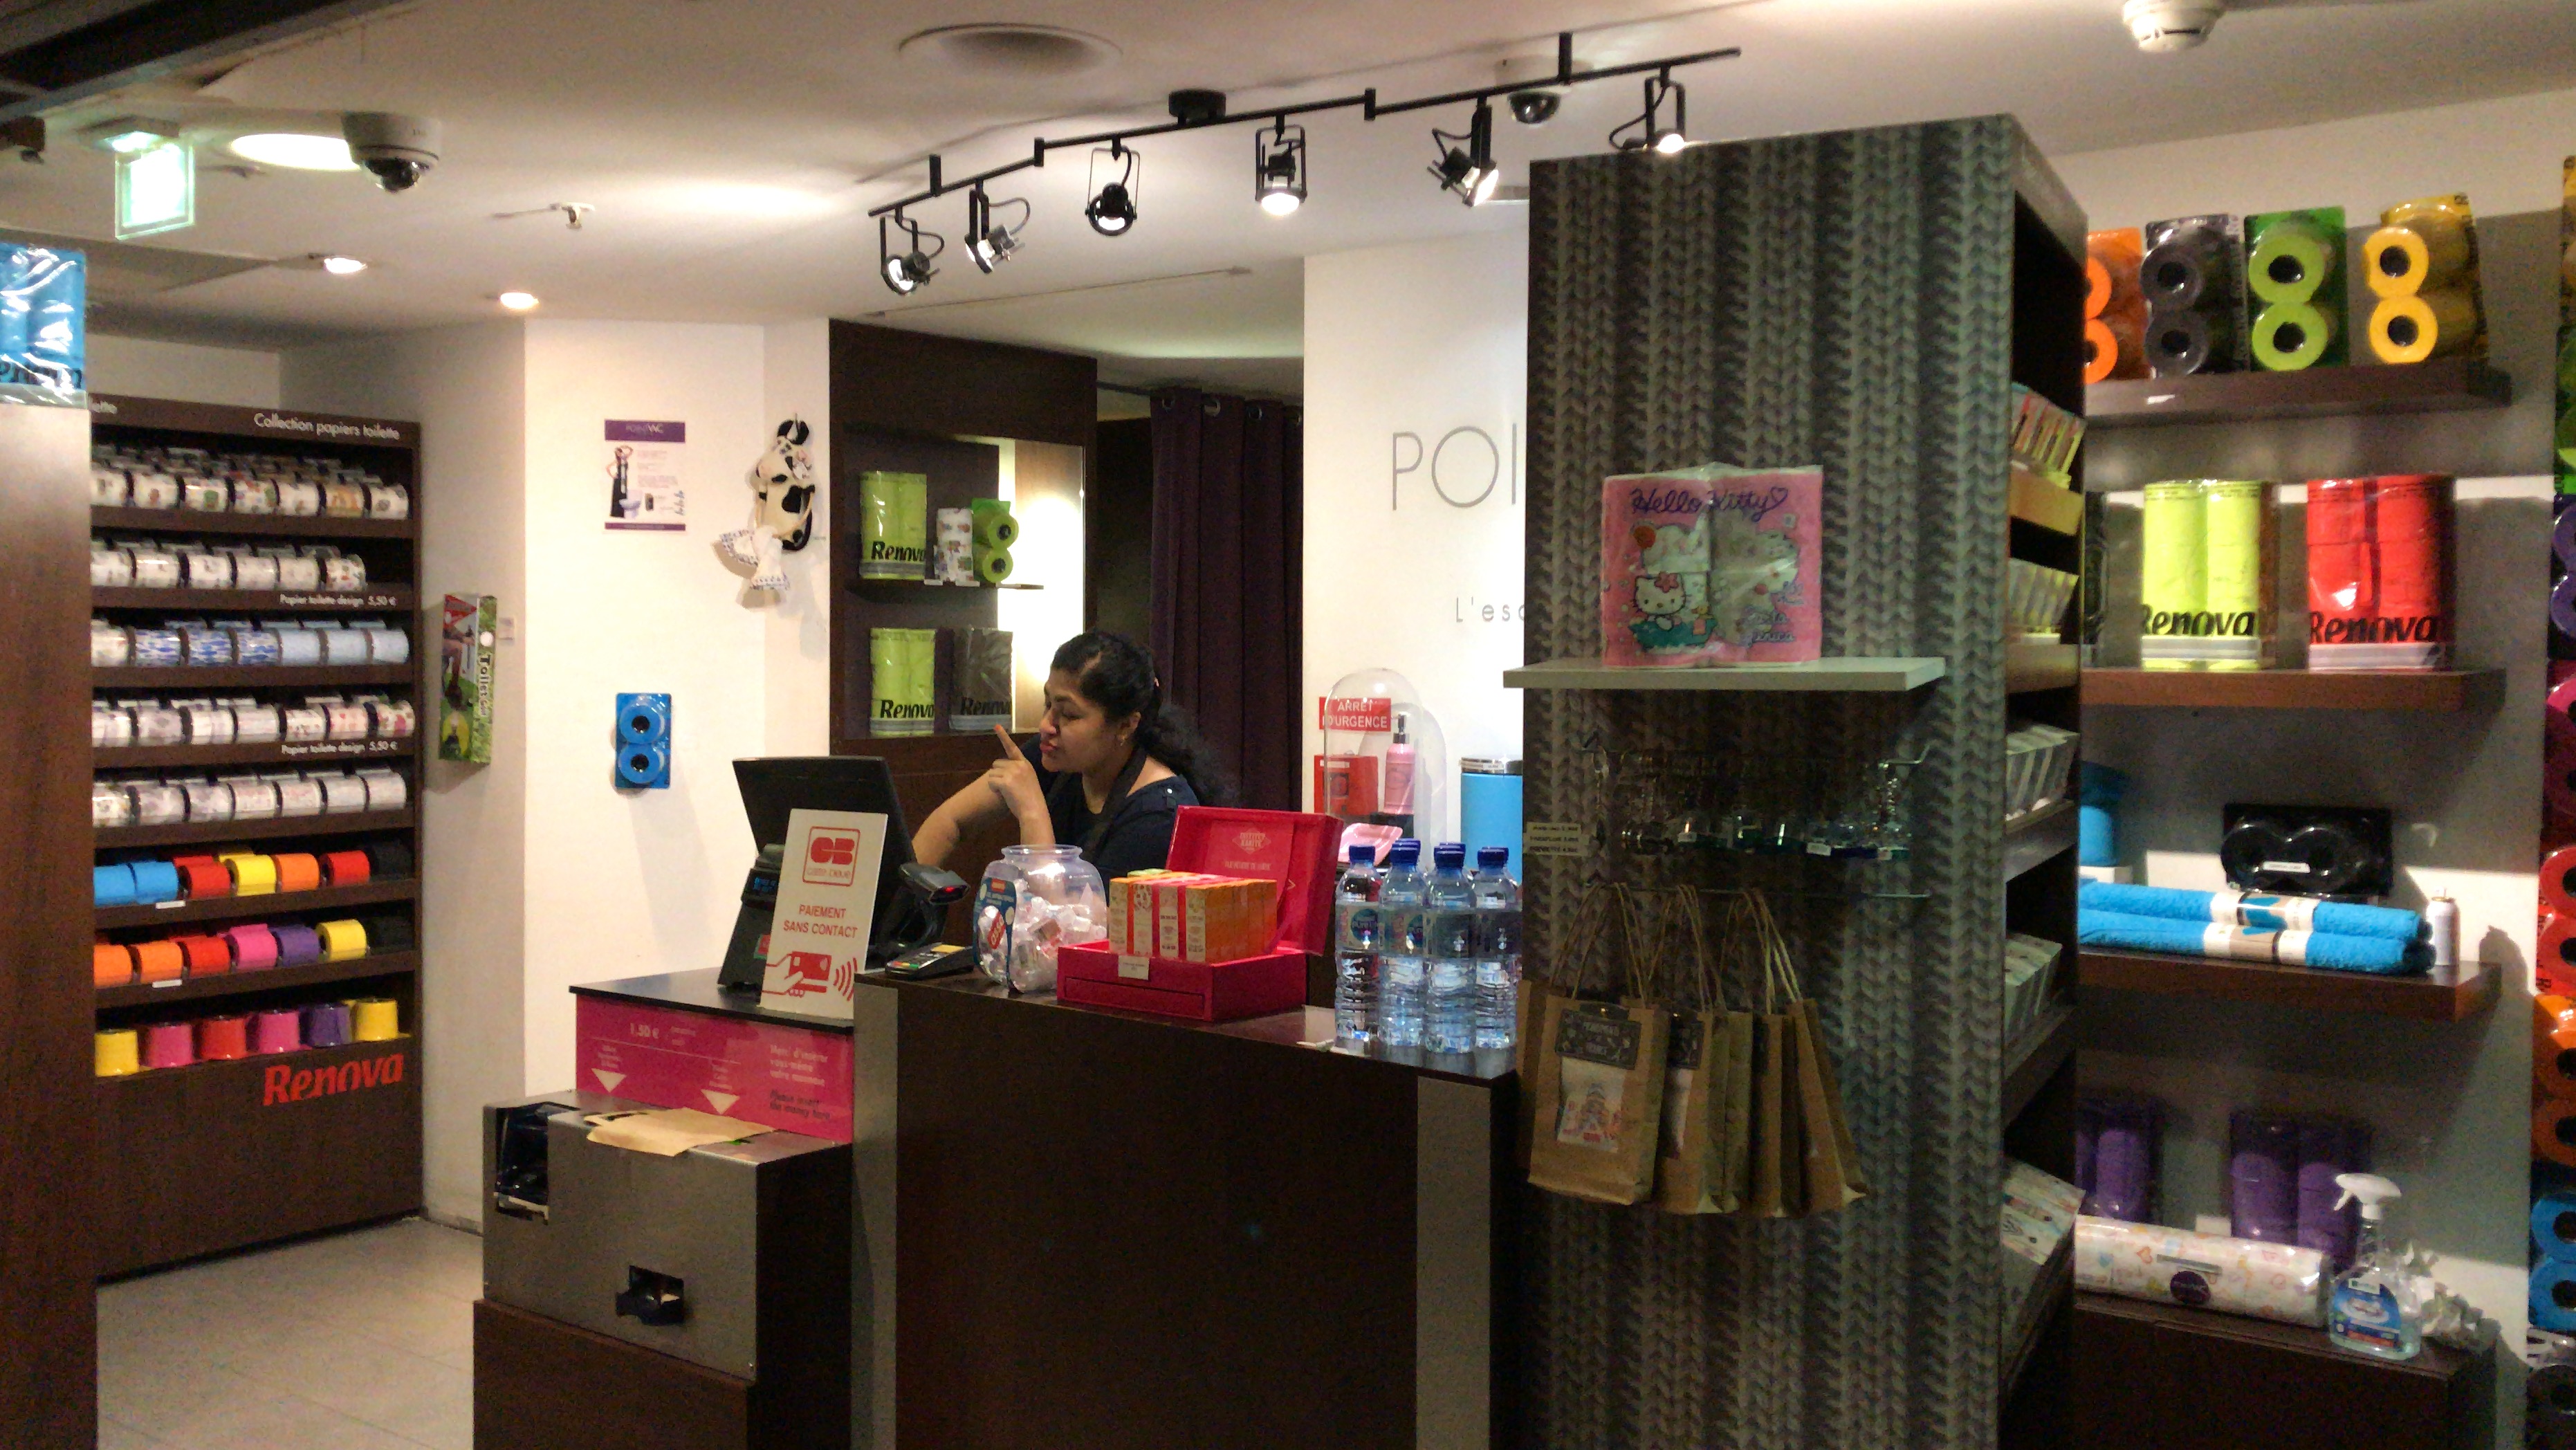
3. Toilet is the new luxury
One thing I couldn’t get over in Paris was that almost every single toilets in malls and stations need to be paid for, with prices ranging from half an euro to over one euro per entry! 😠 This particular one in Carrousel du Louvre took it to another level, costing €1.50 per entry to their ‘luxurious‘ toilets…
And they also sold coloured and patterned toilet rolls for ridiculous prices! 😂
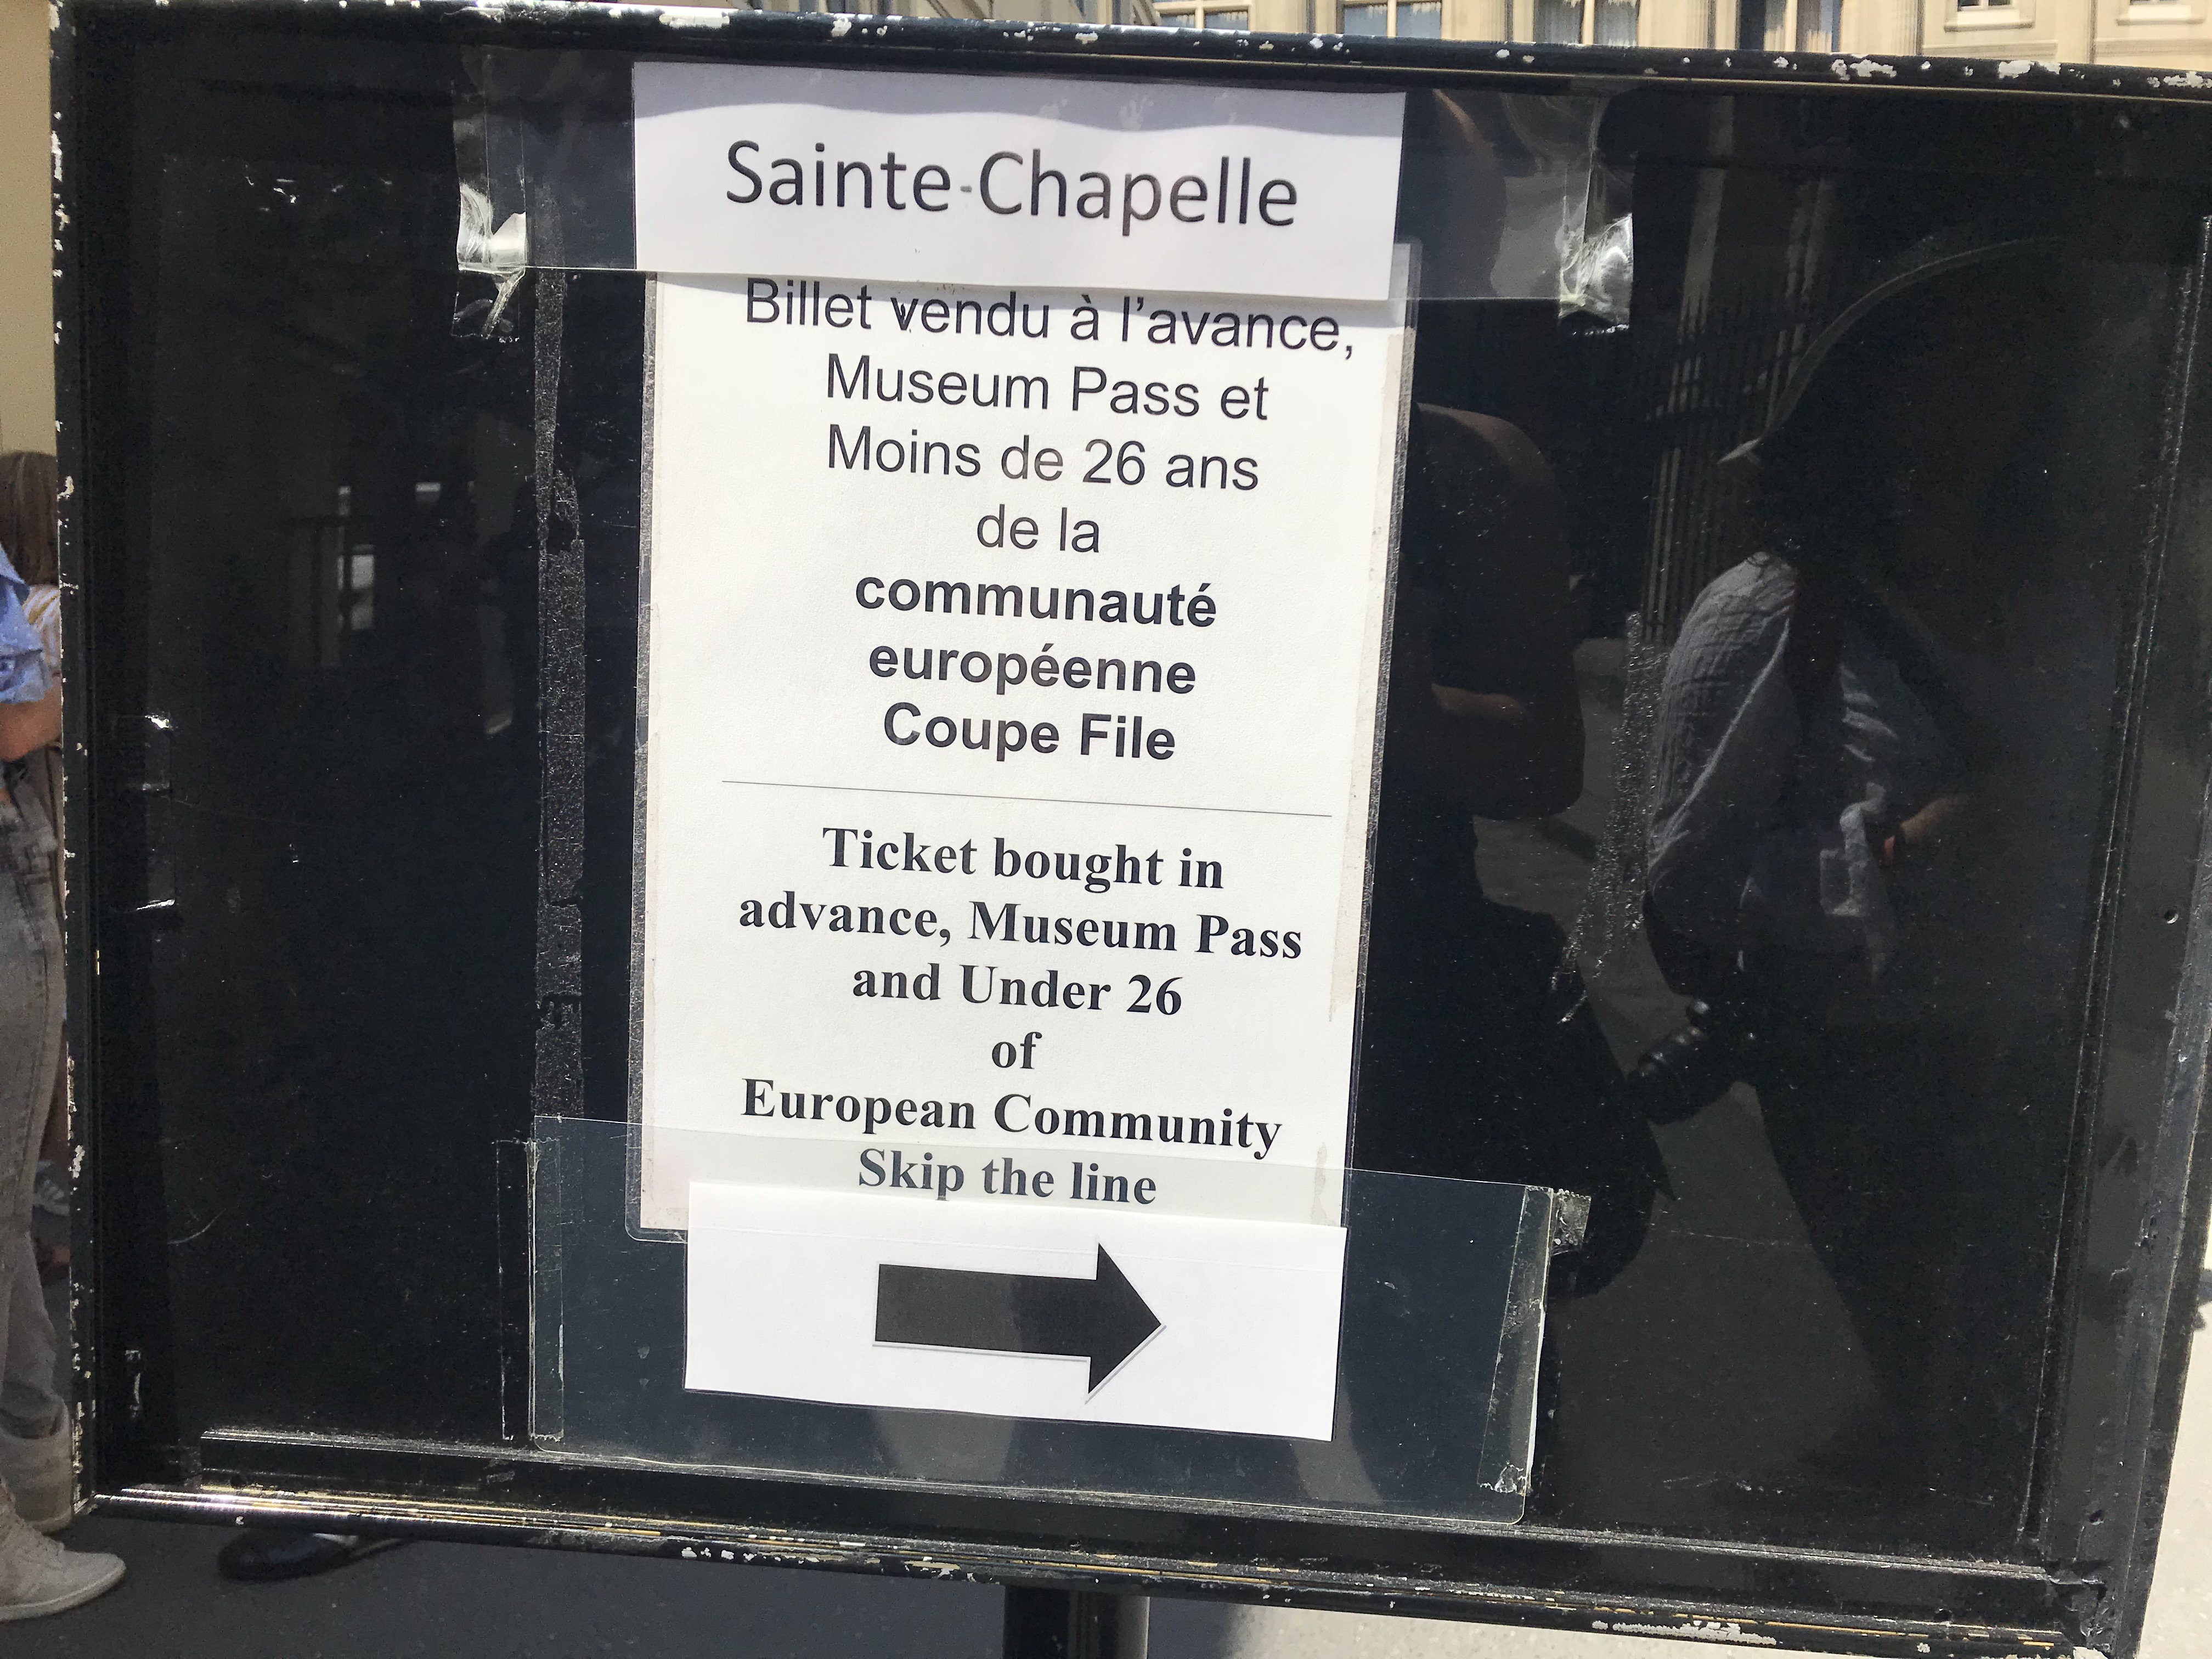
4. Apparently being 25 is not that old at all
Being in the UK, I was used to paying for adult tickets for most things post 16. However, in Paris, it seemed that being 25 was still very much considered ‘young’ in a number of places. In Sainte-Chapelle, not only was I allowed to bypass the long queue, I also did not need to pay for any tickets. Though the words ‘European Community‘ unnerved me due to the current situation with Brexit… (I was told by a member of staff to ‘enjoy it while [I] could.’ 😬) I did get lucky though because I was only a few months away from turning 26. 😂
Though, at the Eiffel Tower, I was annoyed that I just missed out the half price ‘youth’ ticket by a year… 😓
5. CinEiffel in the Ferrié Pavilion
While I collapsed in sweats and nerves after I reached the first floor of the Eiffel Tower, I got to catch this amazing clip in the Ferrié Pavilion section there which was projected onto a three-wall screen. (P.S. I didn’t stay for the whole thing… 😂)
6. ‘Pardon, monsieur.’
On the line of Eiffel Tower, I was taking this picture when a little boy accidentally kicked a football at me… ⚽️ 😵
And when he came up to apologise, that was how I learnt ‘pardon’ meant ‘sorry’ in French. 😅 (Which I later used repeatedly throughout my trip! 😂)
7. The Metro is a whole new world underground
Vending machines on the platform? And mostly air conditioned? London underground could really take a page out of the Metro’s book!
But their exit barriers really reminded me of fire exits. (I was scared I was going to set some random alarm off when I first passed one… 😨)
8. Duck or goose?
When I was at Le Comptoir de La Gastronomie, I took a look around their shop section after my lunch. But I was a little confused by the huge variations in the prices of the different foie gras.
While most of the foie gras was in the region of around €20 to €40, this one I was holding only costed €8. When I asked for the reason, it turned out that this one was made from duck livers rather than those of geese, so it was less valuable. 😯
9. Graffiti in the Catacombs
Be respectful for the dead? (I don’t want to be haunted! 😰😱)
10. And when you’re a tourist, you just take a bunch of random pictures of stuff that you don’t even know…
They always say, ‘they save the best ’til last’. And just like that, the hottest day of the year marked the last leg of my time here in Paris. ☀️☀️ Since my train was scheduled for the evening, I decided to not to head out early this morning, and instead enjoyed every last bits of air con in my hotel room until I needed to check out at midday. 😂❄️ (Though I did took a brief stroll around the neighbourhood at around 9am and got a sandwich for breakfast from a supermarket nearby.)
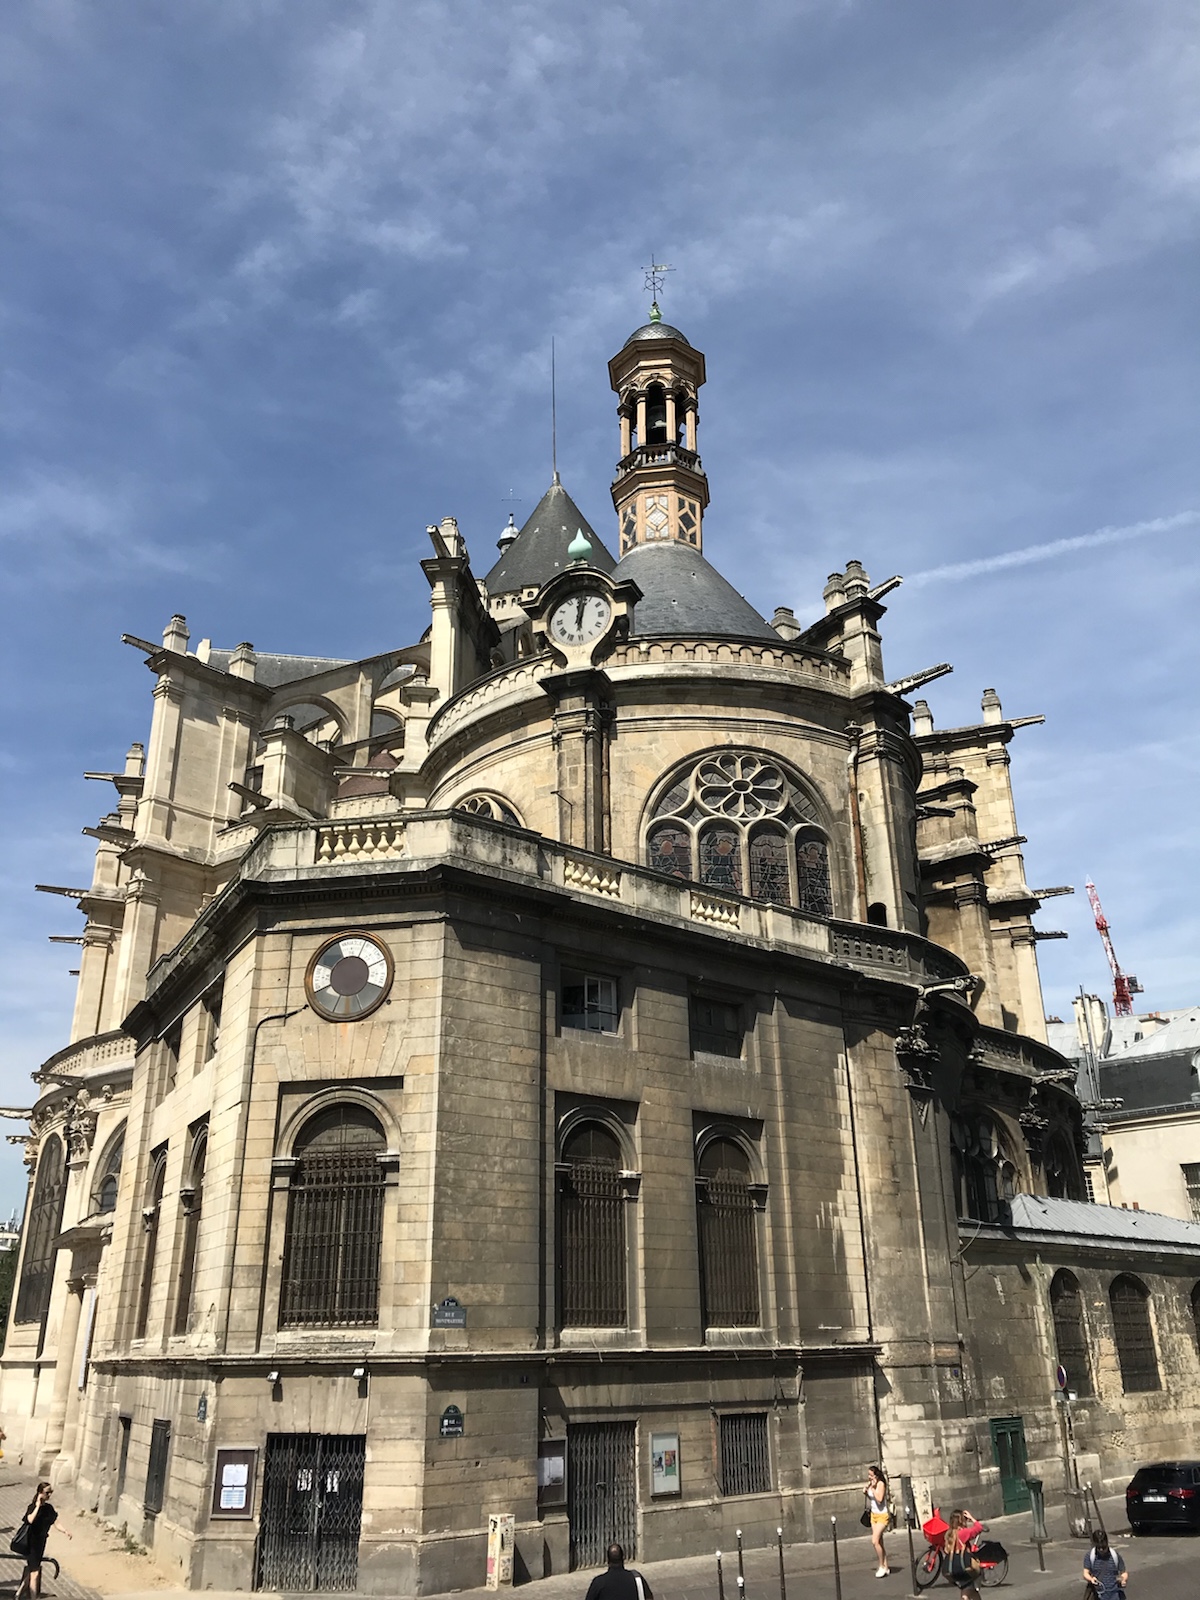
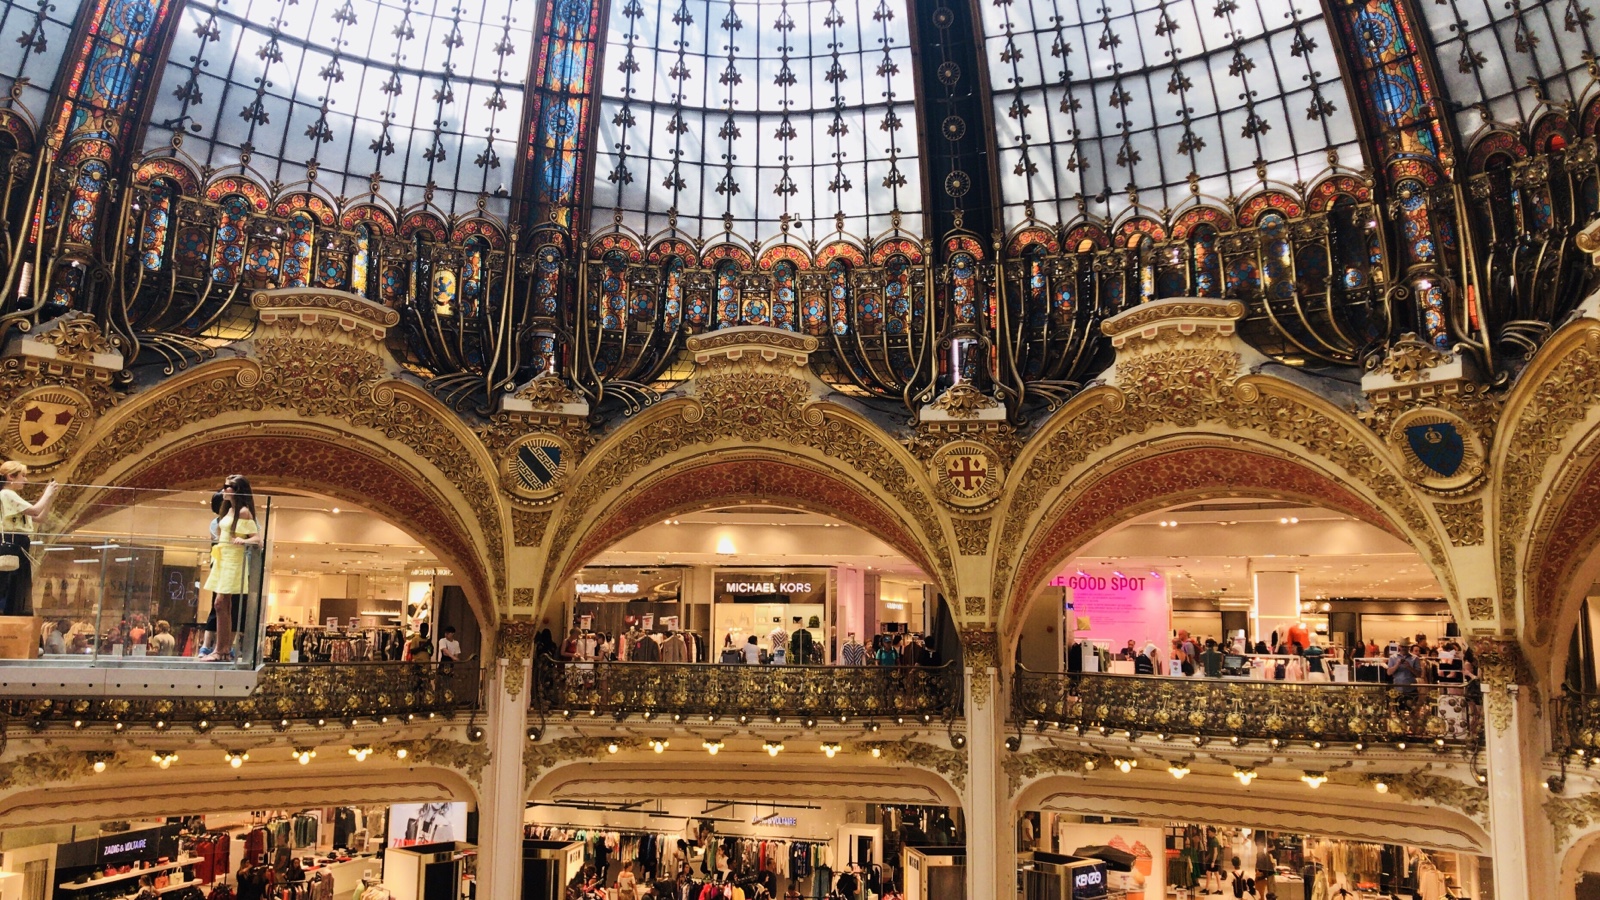
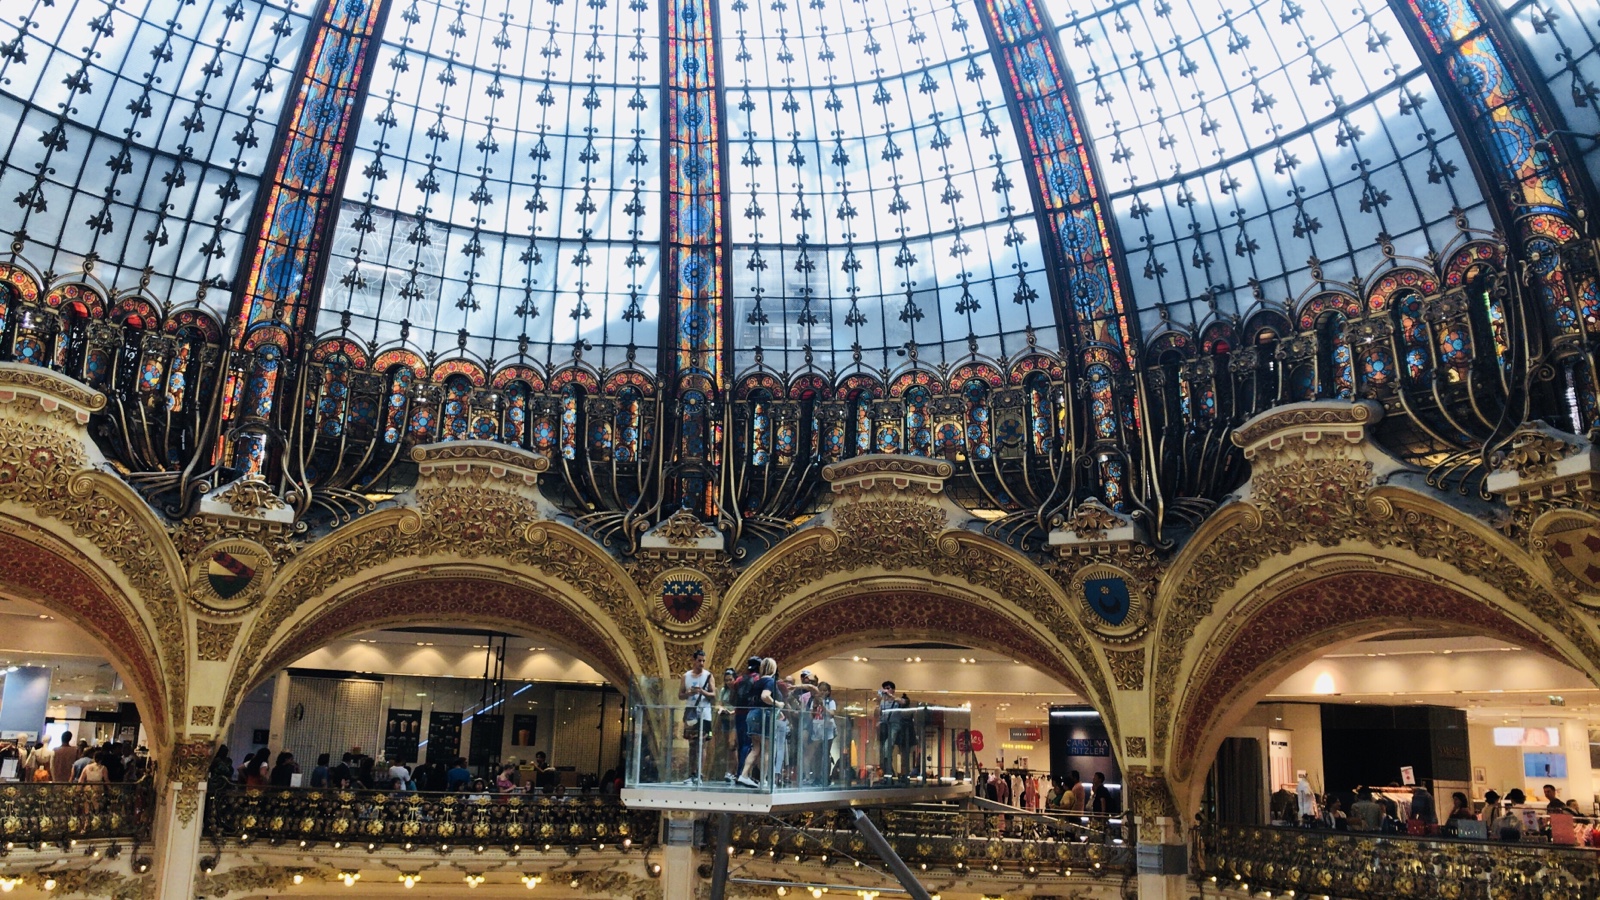
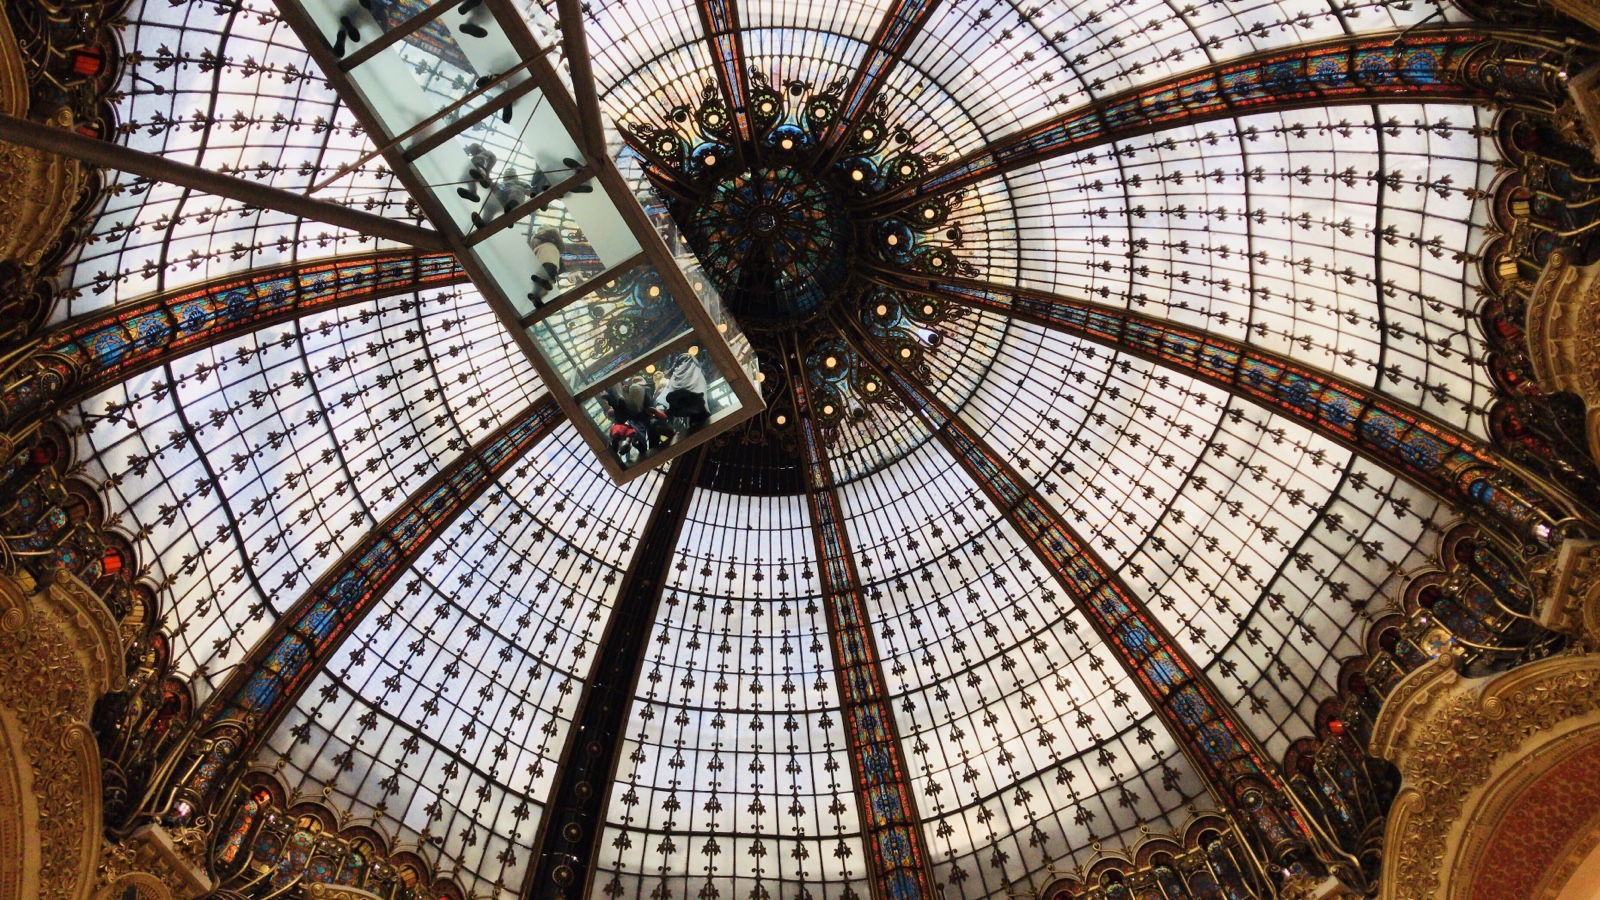
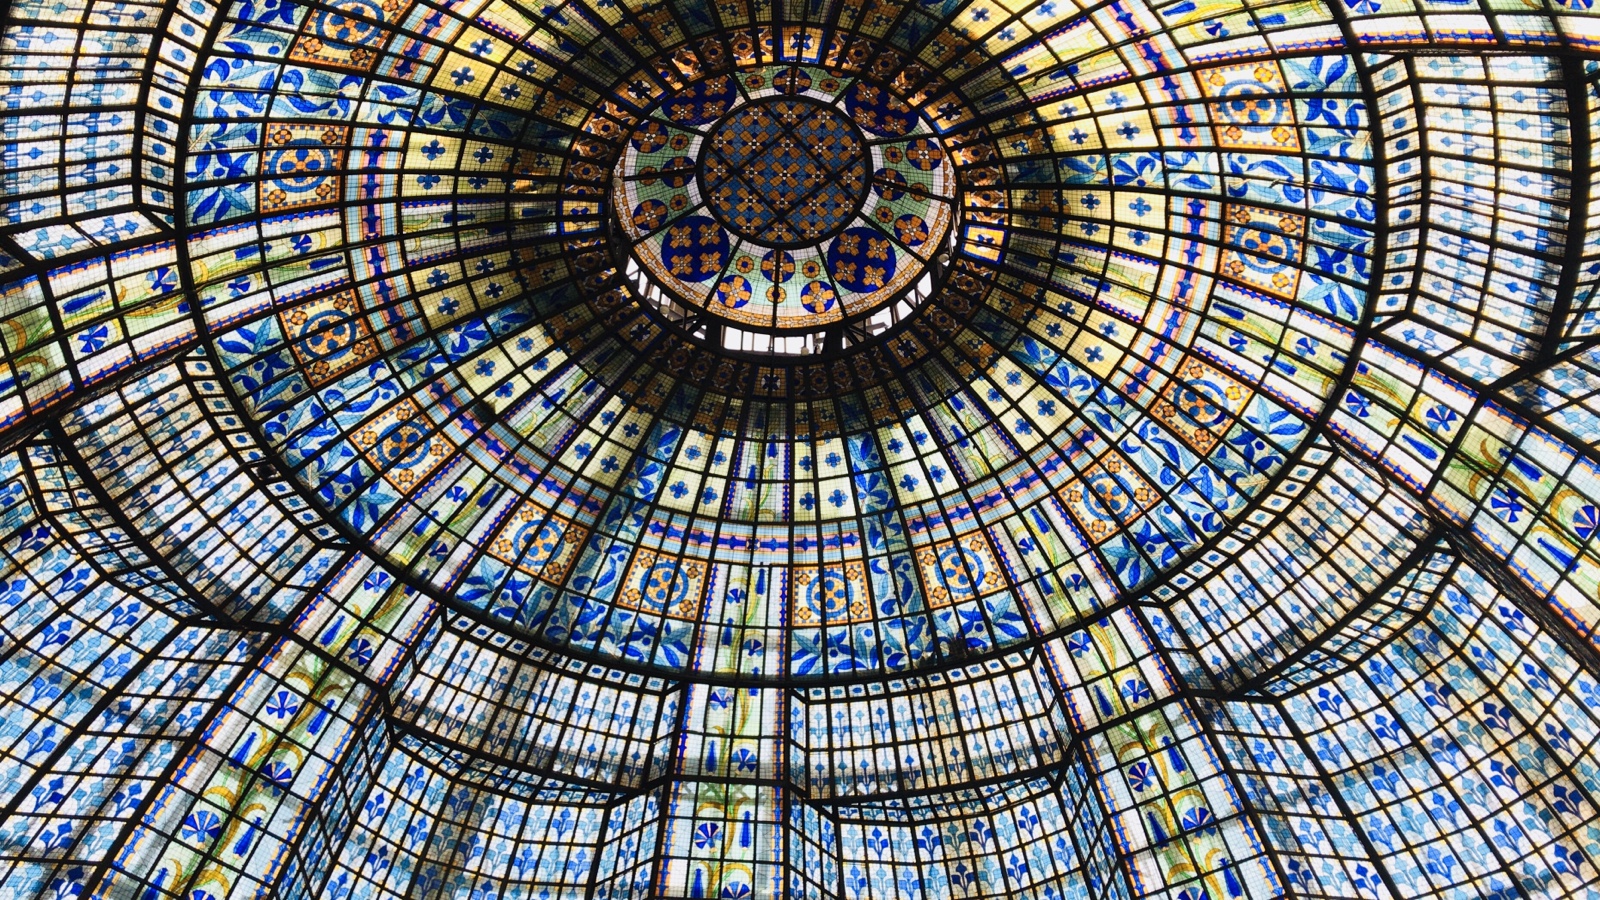
With the intense heat, I refused to stay outdoor for any longer than necessary. Therefore, after leaving my luggage at the hotel’s locker, I headed to some major department stores on the Boulevard Haussmann. I first stopped by Galeries Lafayette, where the building was well known for its stained glass dome. It even has a extended path called ‘glasswalk’ on the 3rd floor that allows visitors to walk out and look right underneath the dome. But I was a little too scared to try due to my fear of height… 😅 (At least the Eiffel Tower wasn’t transparent!)
View from the rooftop. You can see the Eiffel Tower from afar. 😉
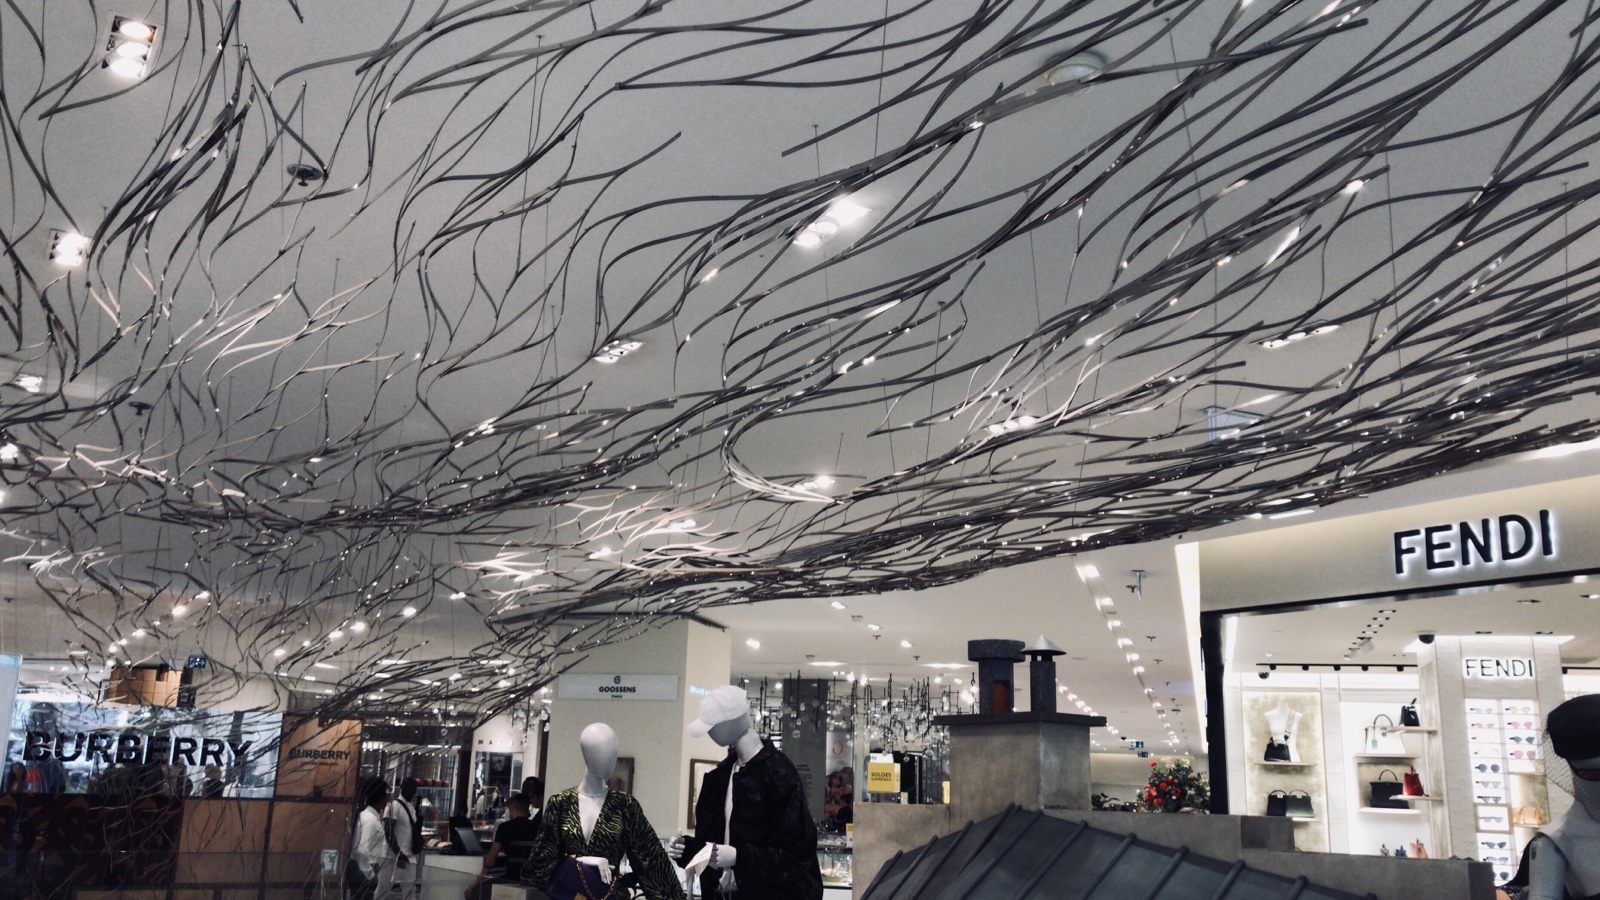
Like many high-end department stores, the place are filled with expensive brands. Now, I got to say I don’t have a particular interest in shopping in general. (Let alone ones that are this expensive!) So, my main focus was on the food available here. The place has restaurants and cafes dotted around each floor of the building. (The place was massive, since, in addition to the main building, there were two other separate buildings that were also part of Galeries Lafayette.) I initially wanted to visit the rooftop restaurant until I discovered it was outdoor… 🔥🔥😓 Not a chance I was going to stay!
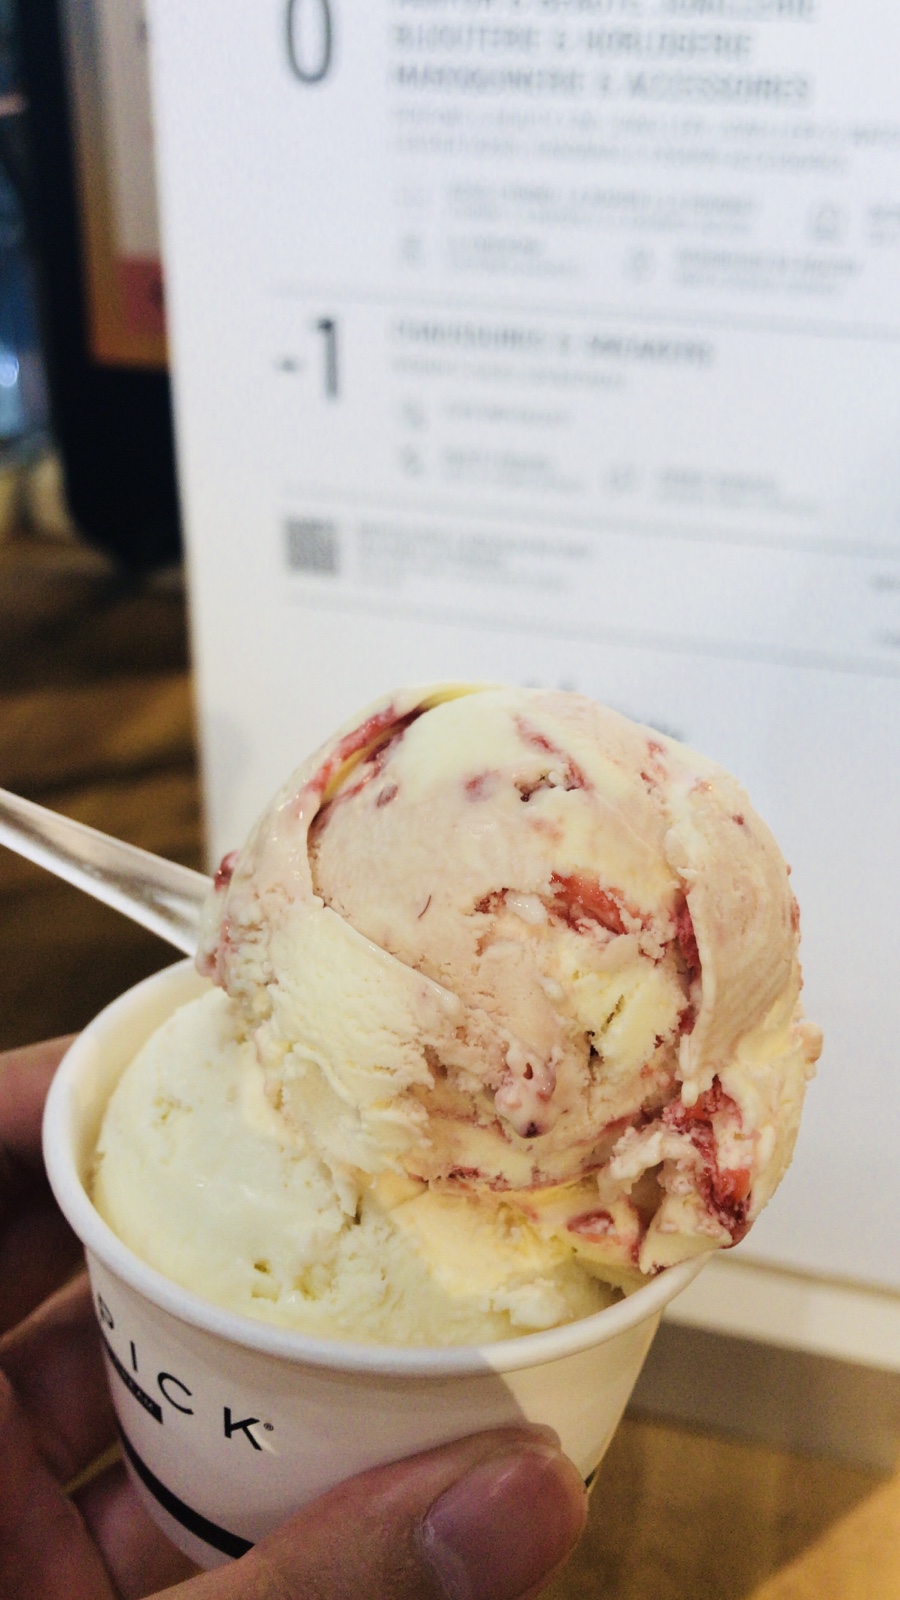
So instead, I went to an Asian restaurant called Panasia on the floor below which turned out to be quite decent. Though I was more interested in trying their ice creams afterwards. 😋 (A quick side story: the place was absolutely packed, so I was sat facing the sun by the window and sharing a table with a kind old lady. She was very gracious in letting me sit directly opposite to avoid the sun and be her brief lunch date lol. 😊)
Panna cotta (top) and coconut (bottom) ice creams
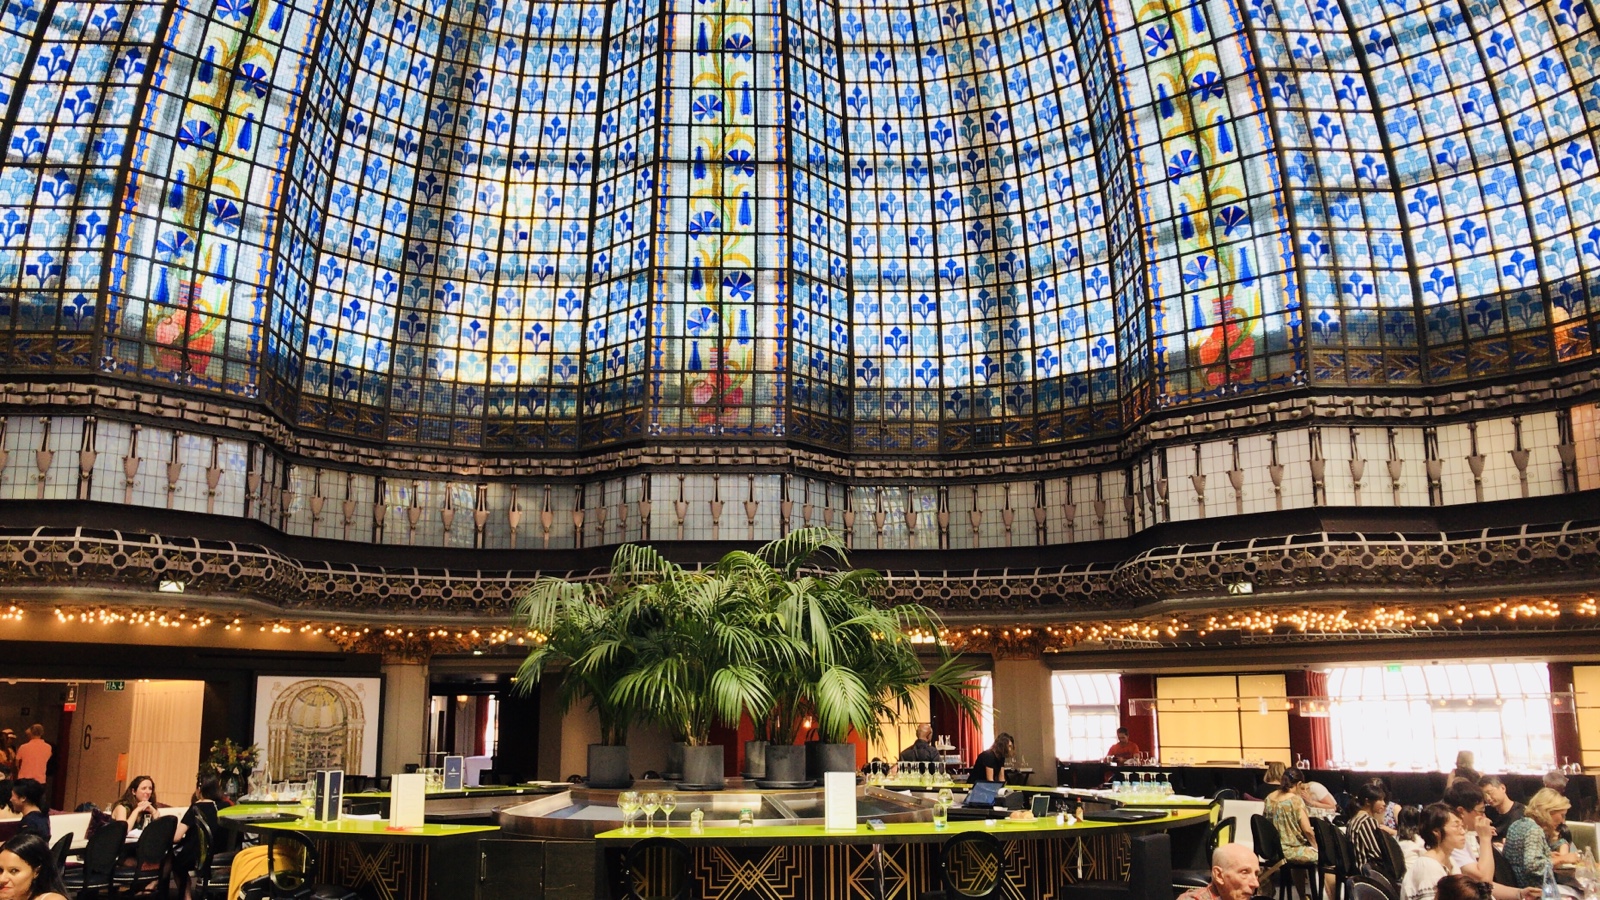
I then moved on to visit the Printemps, another top department store a few blocks down along the Boulevard Haussmann. Similarly, it also has a beautiful stained glass ceiling in its dining area. ❤️
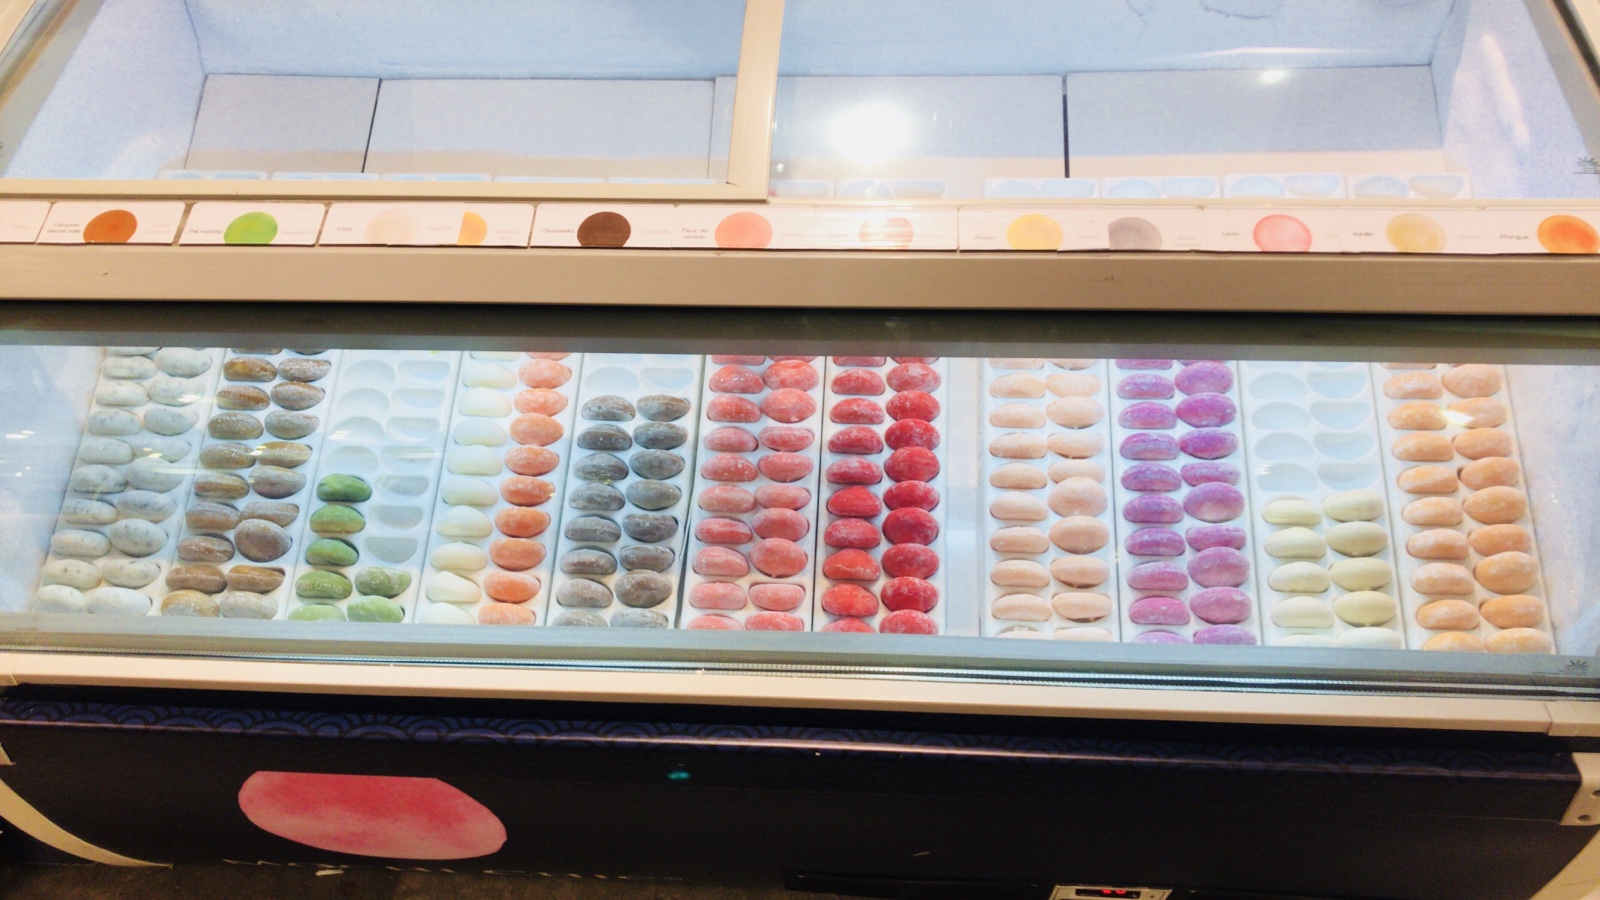
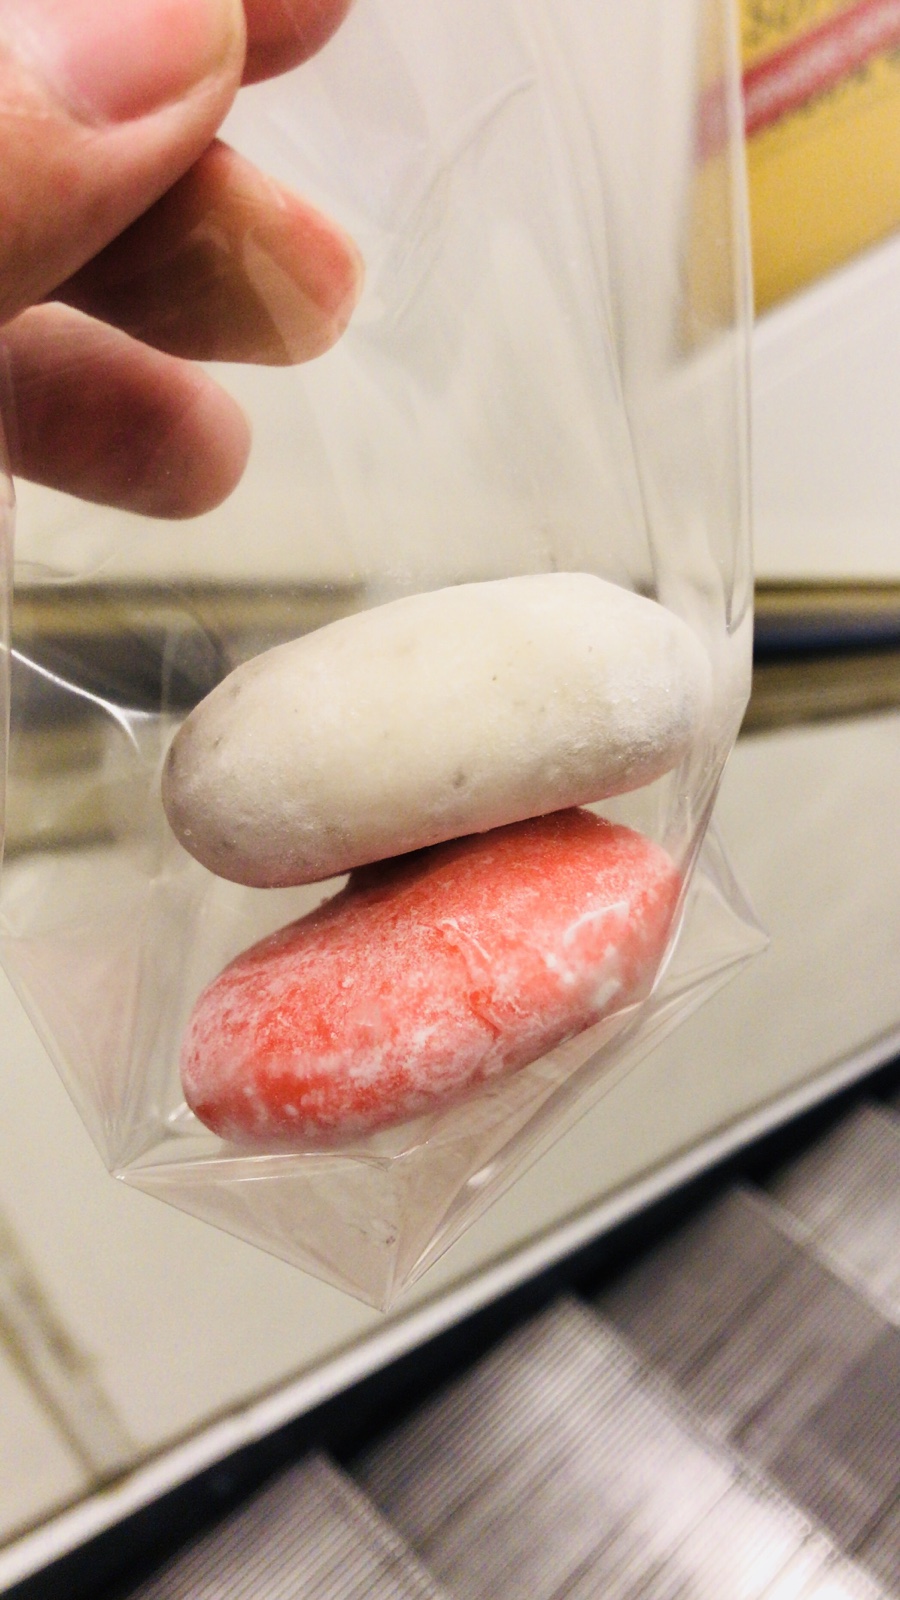
Felt like the hot weather really made me craved for something cold, so I was instantly drawn to an ice cream mochi stand in the store. (For those of you who may not know, mochi is a Japanese treat made from glutinous rice and has a soft yet slightly chewy texture – a bit like marshmallows.) They were popular sweet treats in Hong Kong and my family used to fight over them. 😂
I decided to go for less conventional flavours, and chose the mojito (top) and Sakura (bottom). Sakura is Japanese for cherry blossoms, and this had a subtle floral flavour which was pleasant but not too overpowering to eat. 😊 I absolutely loved the mojito one since I am a big fan of lime and I could definitely taste the alcohol! 😂 (If you eat too many, would you end up drunk lol?)
However, with that, I wrapped up my final activity in Paris and headed back to collect my luggage from the hotel. Learning from my mistake on the first day, I made sure I arrived way earlier at the train station this time!😂 (I actually almost missed the train since I didn’t realise at first that the way we entered the platform was via a different route to others because we needed to pass through passport control and customs! 😓) These past few days almost felt it went too quick. 😕 But I definitely will be coming back to Paris another time! 😁
(P.S. our train was delayed in our journey because of technical issues down the track. I am still on the train now as I write this! 😂)
One of my favourite things in the summer is no doubt a smoky barbecue party with friends. Yesterday, my work colleagues were cooking up a meaty feast in the back garden. Chicken, ribs, prawns, sausages, burgers and all could name! 🍗🍖🍤🌭🍔 What possibly can a meat lover like me says no to? 😋 (Even better with a cocktail in my hand haha!)
Since I did not contribute to the grill, I paid my dues by whipping up (quite literally) a dessert for everyone there. To keep up with the finger food theme, I decided on some chocolate profiteroles topped with freeze-dried raspberries. To top it off, I also did some chocolate-dipped strawberries. The strawberries at this time are the best around this time in the year. One of the biggest joy I get from baking and cooking is to see the joy you bring to others with the food you’ve made. So, very happy that my colleagues enjoyed it! 😊
Chocolate Profiteroles with Freeze-dried Raspberries and Chocolate-dipped Strawberries
Quantity: 15-20 profiteroles
Ingredients:
For the choux pastry:
50g unsalted butter
150ml water
65g strong white flour
30g caster sugar
2 large eggs, beaten
For the pastry cream:
4 egg yolks
65g caster sugar
1 tbsp plain flour
1 tbsp cornflour
350ml milk
1 tsp vanilla extract
Decorations:
200g strawberries
300g dark chocolate
50g white chocolate
Freeze-dried raspberries
Method:
1. Start the choux pastry by placing the butter in water in a saucepan. Heat until the butter has fully melted, bringing the water to boil.
2. Keeping the saucepan over heat, tip all the flour into it in one go. Beat vigorously until it forms a smooth dough. Remove it from heat afterwards.
3. Add the beaten eggs a bit at a time to the dough, stirring vigorously after each addition, to achieve a soft, smooth batter. Take care at this stage as you may not need all your eggs. The batter must not be too runny or too stiff. To check that you have the right consistency, lift a bit of the batter up with a spoon. It should just hang off the spoon, holding a V-shape.
4. Preheat the oven to 200C/400F/gas 6.
5. Line the baking tray with baking parchment. Sprinkle droplets of water over it. (This creates steam to give a crisp crust on your profiteroles.) Pipe your choux batter in small circles, leaving enough gap between them as the choux will rise considerably.
6. Bake the profiteroles for about 25-30 minutes, or until they are golden and fully cooked inside. As soon as they are taken out to cool, use a skewer to pierce the bottoms of each profiteroles to create an air hole to let out steam, and place them on a wire rack.
7. While the profiteroles are baking, make the pastry cream by whisking the egg yolks together with the sugar until a pale yellow is achieved. Sieve the flour and mix it into the yolk mixture until well-combined.
8. Heat the milk with the vanilla in a saucepan over a low heat until there is a gentle simmer.
9. Slowly pour about half of the hot milk to the yolk mixture, whisking as you are adding. Then return the mixture to the remaining milk in the saucepan.
10. Bring the mixture back to boil by heating, whisking continuously as it is cooking, until a smooth custard is formed.
11. Line a tray with cling film, and pour the pastry cream on it to cool and set in the fridge. You may dust some icing sugar over to prevent a skin forming.
12. When the profiteroles are cooled and the pastry cream is set, pipe the pastry cream into the profiteroles through the air hole at the bottom. Take care to ensure the profiteroles are well-filled.
13. Melt the chocolates over a double boiler or using a microwave. (Take care with the white chocolate as it is easy to get overheated and turn lumpy.)
14. Dip the filled profiteroles and strawberries in the melted dark chocolate. Allow it to cool and set slightly before drizzling the melted white chocolate over with a spoon. Dust the profiteroles with freeze-dried raspberries.
The heat wave is finally here in London! ☀️ 🔥 🔥 Now that summer has officially begun, how many of you have planned your holiday already? Whether you’re spending time with friends, families or alone by yourself, summer is an important for one to unwind and enjoy the beauty of nature. For someone who loves exploring new places, you may be surprised to hear that I don’t actually travel abroad an awful lot during the holidays. However, I do dream about lying alone on a beach 🏖🏝 (or next to a hunky companion hehe), staring at the clear water or the bright blue sky, and snoozing under the sun with a cold, tropical drink in my hand…🍹
Meanwhile, I will imitate this tropical feeling at home by making my favourite mango mousse cake. This mango mousse cake is one of my more complicated dessert. Inside the mousses hides a layer of coconut sponge cake and strawberry clear jelly over a buttery digestive biscuit base. The cake is finished with a mango glaze and topped with a tempered chocolate nest filled with coconut white chocolate truffles. It does take a bit of time to make this but it’s well worth the effort!
Tropical Mango Mousse Cake
Quantity: 1 cake
Ingredients:
For the clear strawberry jelly:
5g leaf gelatine
225ml lemonade
5-6 strawberries, chopped
For the digestive biscuit base:
200g digestive biscuit
70g unsalted butter, melted
For the coconut sponge cake:
2 eggs, separated
32g caster sugar
24g flavourless oil
28ml warm water
1 tsp vanilla extract
100g self-raising flour
20g desiccated coconut
For the mango mousse:
11g leaf gelatine
450g mango purée/pulp
50g caster sugar
400ml double cream
For the coconut white chocolate truffles,
100g white chocolate, chopped
30ml double cream
1 tbsp butter
Desiccated coconut
For the tempered chocolate decorations:
300g dark chocolate
For the mango glaze:
56ml water
47g caster sugar
1 lemon, peels only
16g leaf gelatine
175g mango purée/pulp
Other decorations:
Fresh mangoes, chopped
Desiccated coconut
Dark chocolate
White chocolate stars
You will also need at least a small cake tin and a larger cake tin (both should have a loose base) to create the layering effect.
Method:
1. Start the jelly first by soaking the leaf gelatine in cold water. Line the small cake tin with cling film.
2. Bring the lemonade to boil in a saucepan. Squeeze off any excess water from the soaked gelatine and stir it into the saucepan until fully dissolved. Take it off the heat, and add in the strawberries. Pour it into the tin and place it into a fridge for about 2-3 hours to set. Once the jelly is set, remove it from the cake tin with the cling film and continue to chill it in the fridge until use.
3. Prepare the digestive biscuit base by blitzing or grinding down the digestive biscuits to fine crumbs. Mix in the melted butter. Line the bottom of the larger cake tin with a cling film, and spread the biscuit mixture evenly at the base of the cake tin. Chill the biscuit base in the fridge for about 30 minutes so it can firm up.
4. Preheat the oven to 180C/350F/gas 4. For the sponge cake, whisk the egg whites in a large bowl with half of the sugar until stiff.
5. In a different bowl, mix the yolk, oil, water, vanilla extract and the remaining sugar together until smooth. Sieve in the flour and add the desiccated coconut into it, and mix until well-combined. Fold this mixture into the whipped egg whites.
4. Grease the small cake tin and pour in the cake batter. Bake for 20-25 minutes, or until golden and a skewer inserted into the centre comes out clean. Remove the cake from the mould and cool on a wire rack.
5. To make the mango mousse, soak the leaf gelatine in cold water and whip the double cream to soft peaks.
6. Warm the mango purée/pulp with the sugar in a saucepan. Squeeze excess water off from the gelatine and stir it in until fully dissolved. Pass the purée mixture through the sieve. Pour and fold it into the whipped cream until smooth.
7. To assemble the mousse cake, pour in some of the mousse into the larger cake tin with the digestive biscuit base. Place the coconut sponge at the centre and flip the strawberry jelly on top of the sponge using the cling film. Fill up the sides with the mango mousse (ensure they are completely filled up, or else you will see gaps later on), and pour the remaining mousse on top and spread evenly. Place the mousse cake into the fridge to set for about 4 hours.
8. To make the truffles, place the white chocolate, cream and butter in a bowl and heat it a microwave in 20-seconds intervals until melted. (Take care as white chocolate is easy to get overheated and burnt.) Cover the bowl and chill the chocolate in the fridge until firm. Grease your hand with a bit of oil. Scoop and roll the cooled white chocolate in your hand to shape into balls. Roll the truffle balls in desiccated coconut to cover them.
9. For the tempered chocolate decorations, warm two thirds of the dark chocolate in a double boiler to 45-50C/113-122F until melted. Stir in the remaining chocolate to cool it to 31-32C/87-89F.
10. For the chocolate palm trees, pipe the tempered chocolate into shapes on baking parchment. For the chocolate sticks, cut out a rectangular strip of baking parchment and pipe diagonally across it to create a net effect, then carefully roll the paper into a tube shape and secure with tape. For the chocolate nest, flip a bowl upside down and covered with baking parchment, then similarly pipe the chocolate in a net pattern around the bowl. Leave the chocolate decorations to cool and set in room temperature before removing and use.
11. Once the mousse cake is set, remove it from the cake tin and pull out the cling film underneath. Keep the cake cooled in the fridge while preparing the glaze.
12. To make the mango glaze, first make a syrup by heating the water, sugar and lemon peels in a saucepan for 2-3 minutes. Remove the lemon peels.
13. Soak the leaf gelatine in cold water. Add the mango purée/pulp to the syrup and heat. Squeeze the excess water off the soaked gelatine and stir it in until fully dissolved. Pass the glaze through a sieve and let it cool slightly before use.
14. Place the cake on a wire rack over a tray. Pour the glaze over in a swirl motion to cover the cake evenly. Dust the sides with desiccated coconut.
15. While the glaze is still setting, decorate the cake with fresh mangos, truffles and the chocolate decorations. (Use a knife to cut open a small gap to insert the palm trees into the cake). Move the cake to a stand and keep in the fridge until serving.
Now, excuse me as I continue to stare upon the bright blue sky. 😉
The sunlight is finally back in London! Having powered my way through work last night, I decided to treat myself today by visiting Central London. What’s better than eating outside when the sun is out? For lunch today, I visited Duck & Waffle Local by Piccadilly Circus. I had walked past this restaurant many times before, but never tried it until now. Duck is always one of my favourite protein to eat, so it’s really a no-brainer choice for me.
The first dish I tried was a foie gras crème brûlée served with a toasted brioche. I was intrigued by the idea of a savoury take on this traditional French dessert. I particularly enjoyed the silky, smooth texture of the crème brûlée, and the savoury note from the foie gras accompanied well with the creaminess of the dish. Personally, I think I may prefer a thinner caramel on top as it did get slightly too rich and heavy after a couple of bites, but it’s nonetheless quite good.
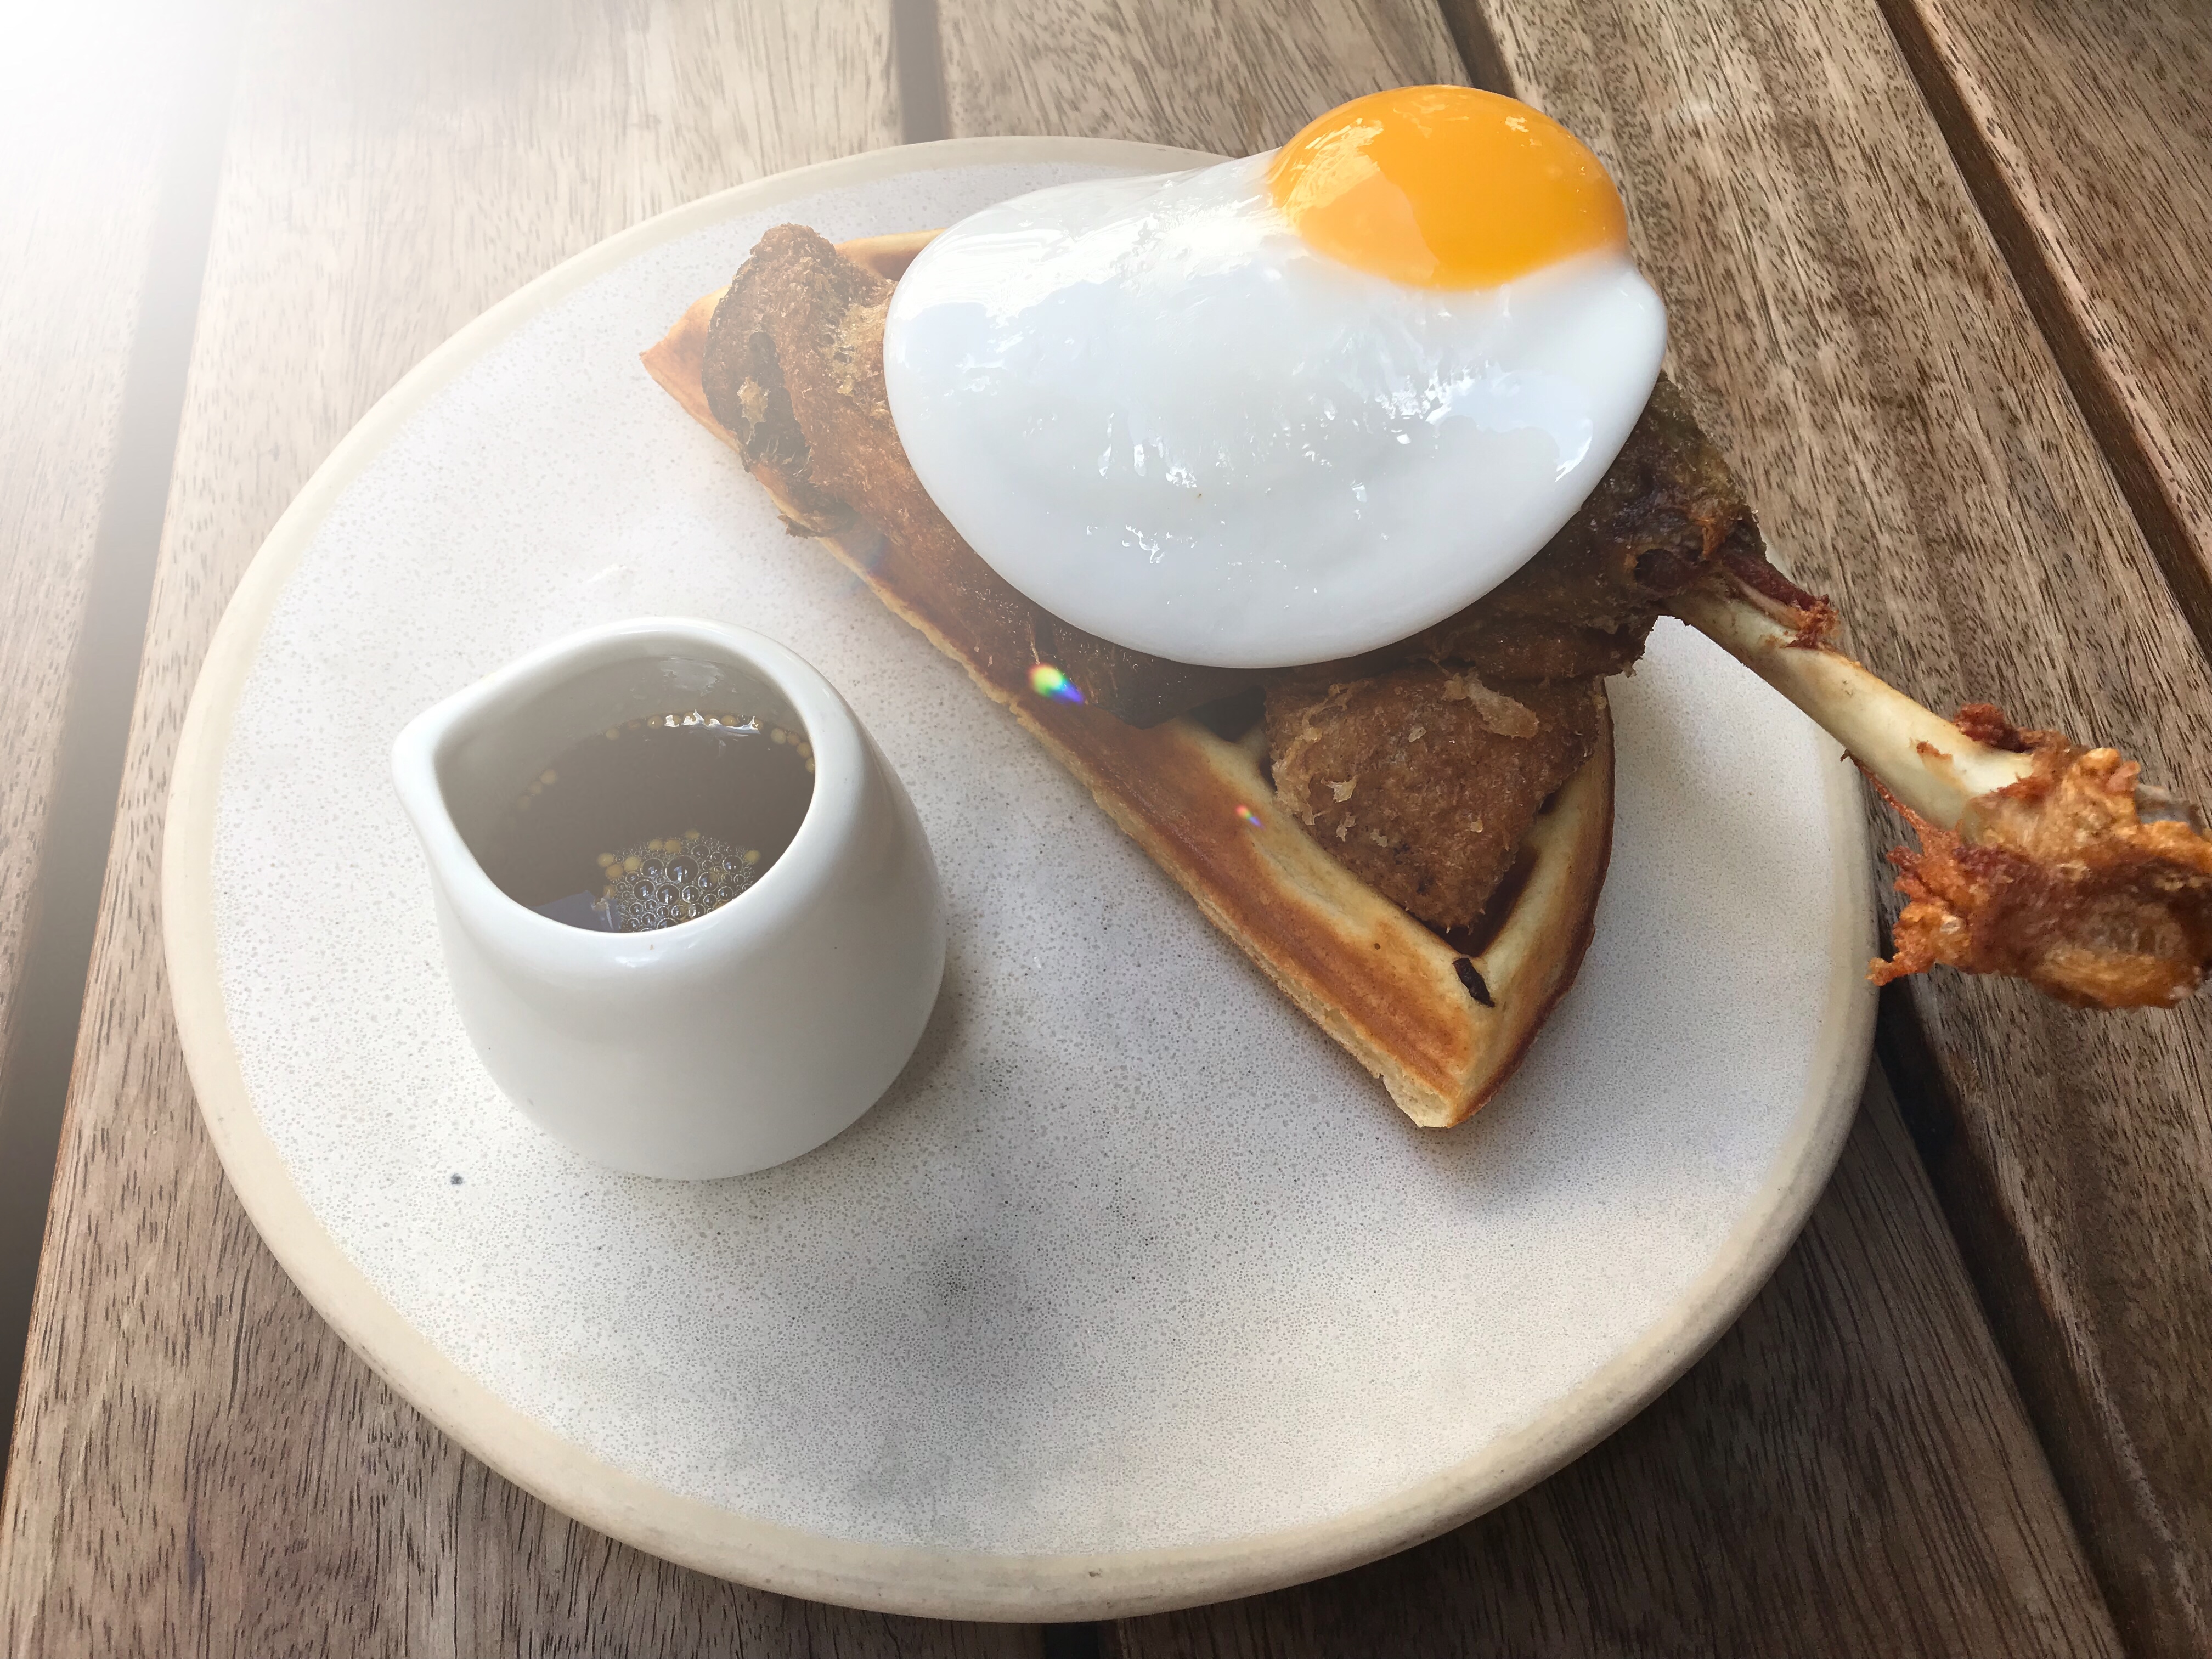
For the second dish, I ordered their signature dish: confit duck leg and waffles with a fried duck egg and mustard maple syrup. This modern, French spin on the American classic was cooked to almost perfection. Waffles were deliciously crispy and the duck was scrumptious when paired with the sweet maple syrup. And the fried duck egg to me was more than a garnish as I felt it added another level of texture and complexity to the overall dish.
Those who know me will know that besides food, movies are another great passion of mine. Today, I was particularly excited coming outside because of the release of Toy Story 4. Like many of you out there, I grew up watching the franchise since I saw the first film when I was around 4 years old. To think of how many years have passed since then, it was almost a scary feeling. So many good and bad moments in the last 20 or so years, it was like a trip down the memory lane in my mind.
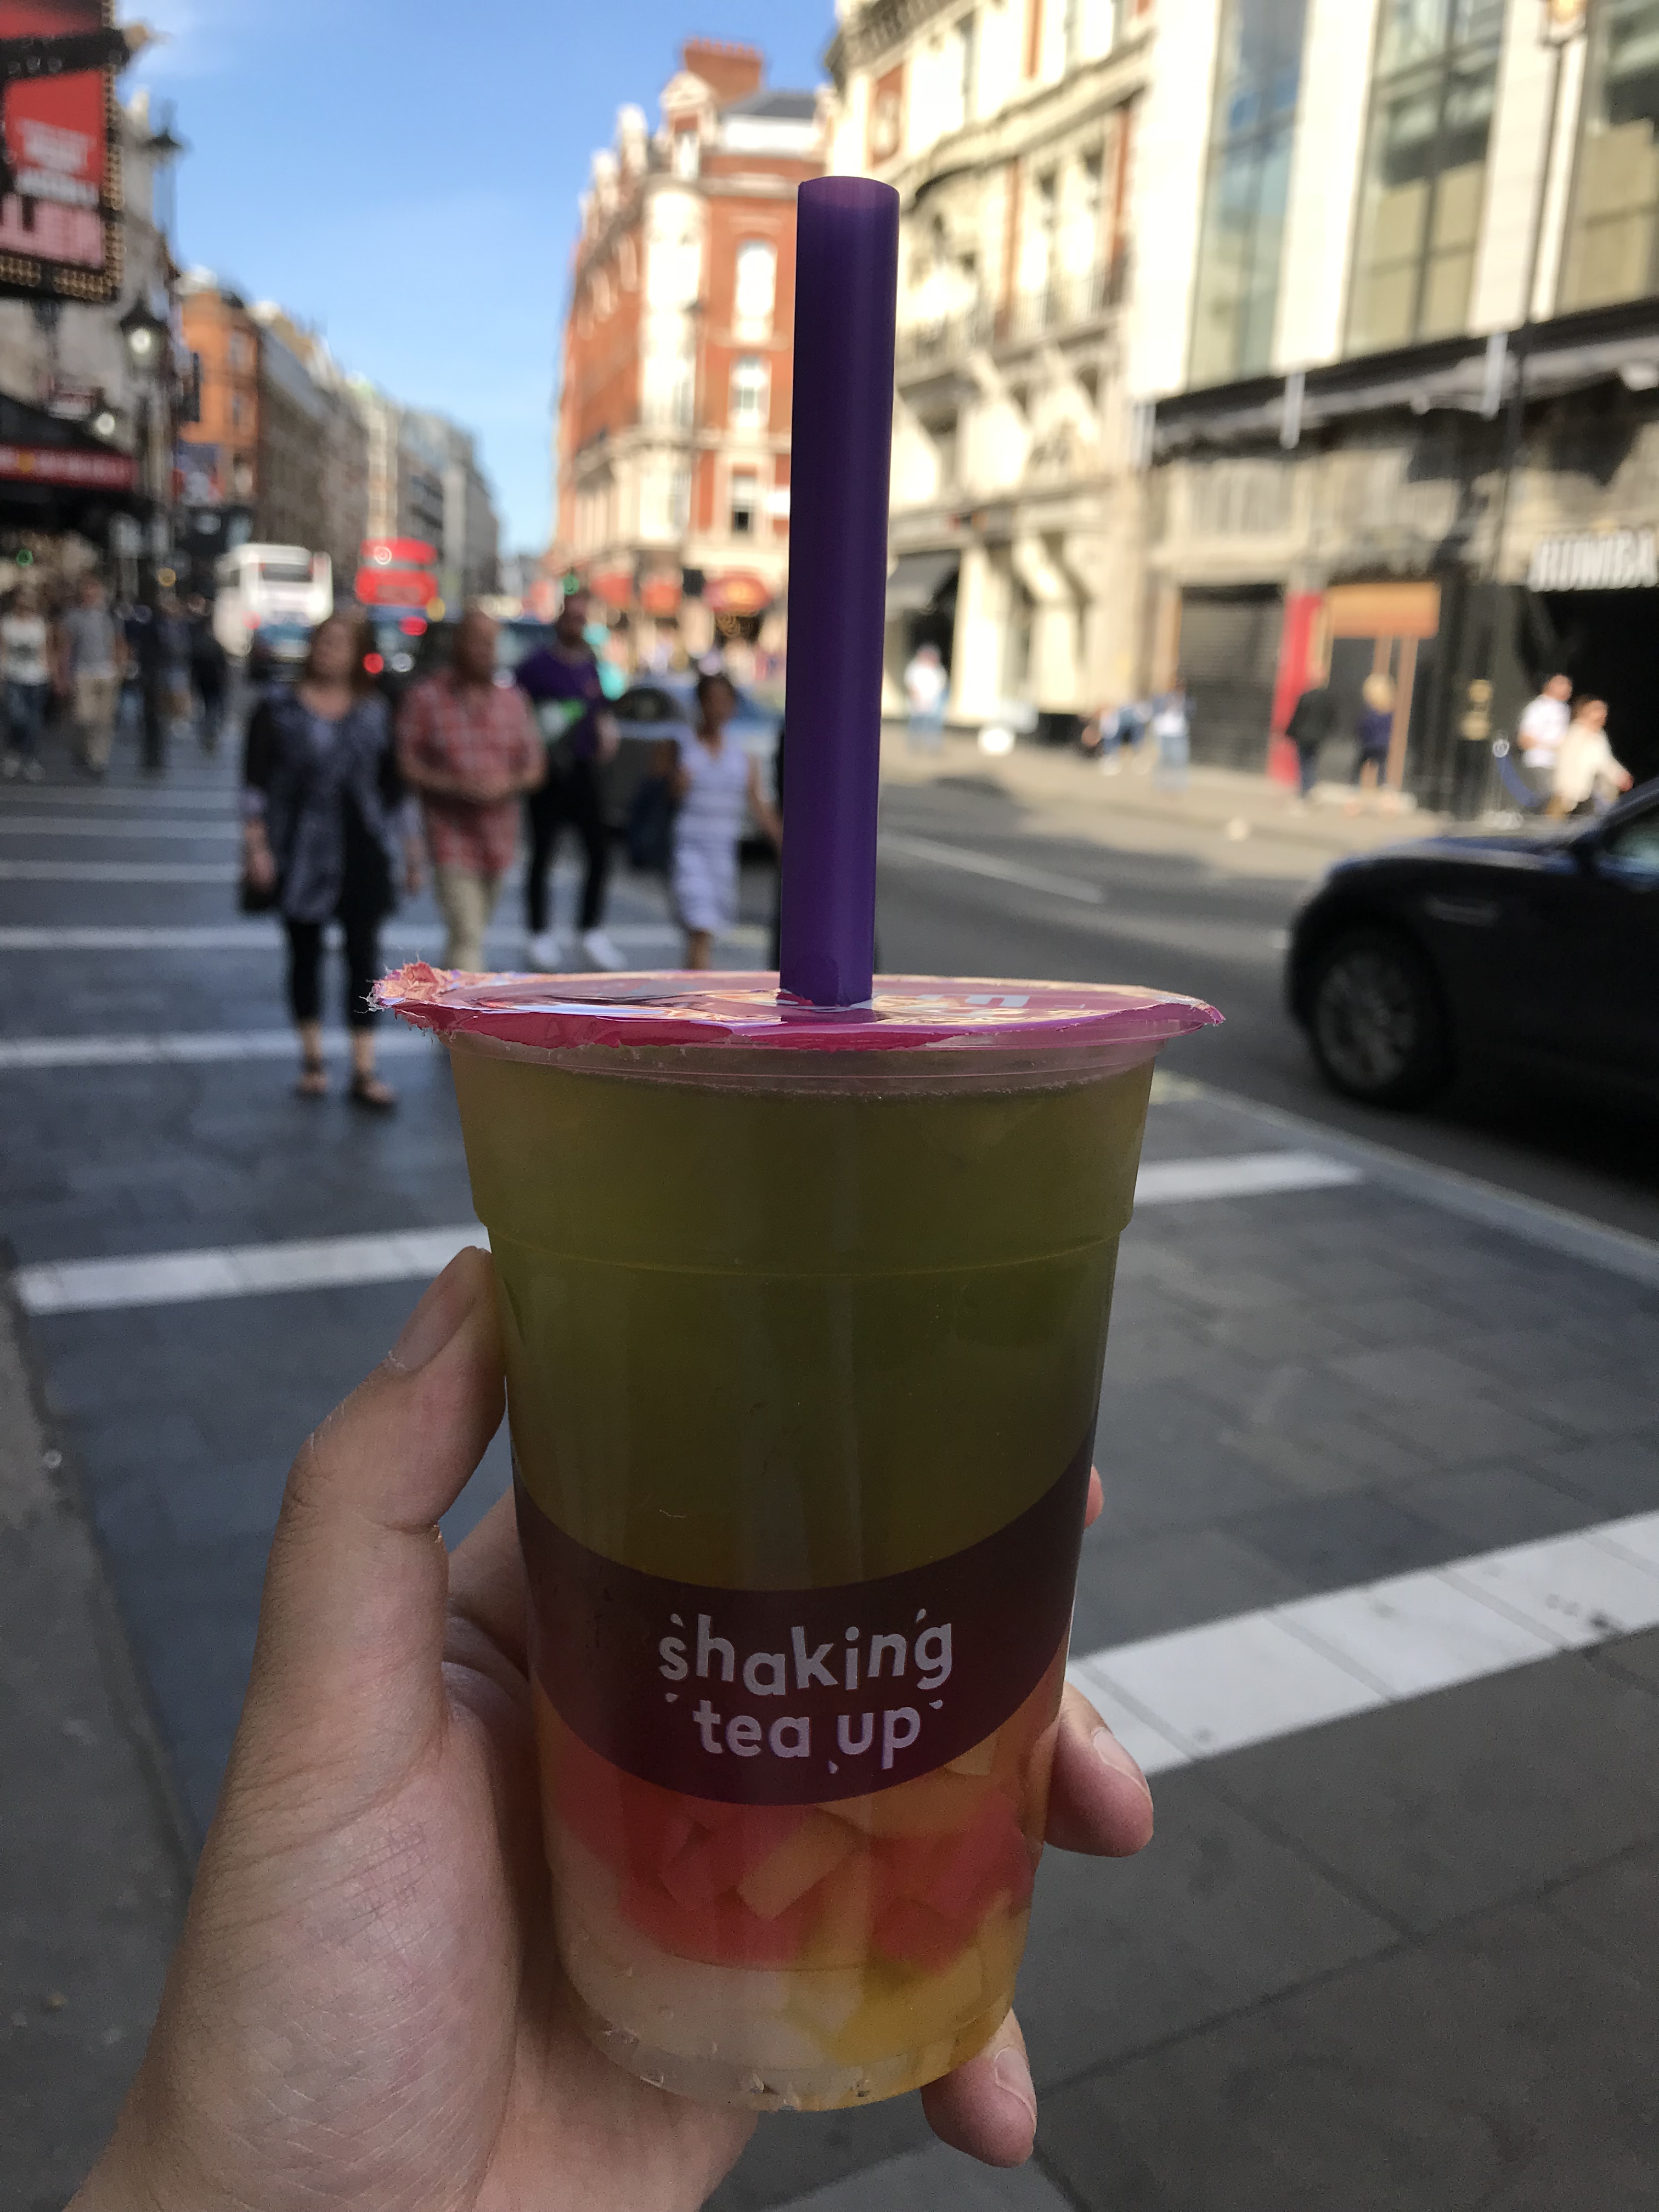
Grabbing a bubble tea before the movie!Long time no see, Buzz and Bo Peep! 👋 (I actually ended up going to another cinema nearby ’cause the ticket in this place was really expensive… 😓)Waiting for the ads to finish before the showing…
Without spoiling the movie for people, I am just going to say it was a lovely film to watch and to see these wonderful characters again brought back so much joy and happy memories! (And to see Woody and Bo Peep reunited for the first time after all these years, it filled me with warmth and hope for the future.)
After the movie, it won’t be like me to not have some more food before heading home, right? So I ended up grabbing a chicken katsu curry and a gelato before riding the bus back.
To quote Buzz Lightyear, here is to another Saturday and ‘to infinity and beyond‘!