The Last Weekend

Time really does fly when you’re having fun! Before long, my holiday is soon coming to an end and busy life will once again take over. It’s funny though that for my last weekend, I don’t feel as proactive in going outside as much as I thought I would, and rather I seem to prefer spending more time chilling at home. (Though it was great last night drinking with some old uni friends in Soho and then wandered into a late-night restaurant in Chinatown whilst tipsy. 😂😂)

With work looming around the corner, I have been trying my best to put the stress at the back of my mind by doing what I love most– and that’s baking of course! If you had somehow read my posts earlier this month, you would see that I went on a bread-making spree. Continuing this, I decided to make ciabatta for the first time yesterday. I find that there is something very unique about bread that is very stress-relieving. Unlike cake and pastry, bread needs time to be good. Whilst the impatient side of me may sometimes find that unbearable, I also found that oddly relaxing. Sitting around and lying down whilst waiting for the bread to slowly prove and rise… it’s like telling me, ‘What’s the point of rushing in life? Let’s just take the time to savour every moment that comes along…’ And that’s what I am going to do now, it’s sit and relax, and enjoy the now. 🙂

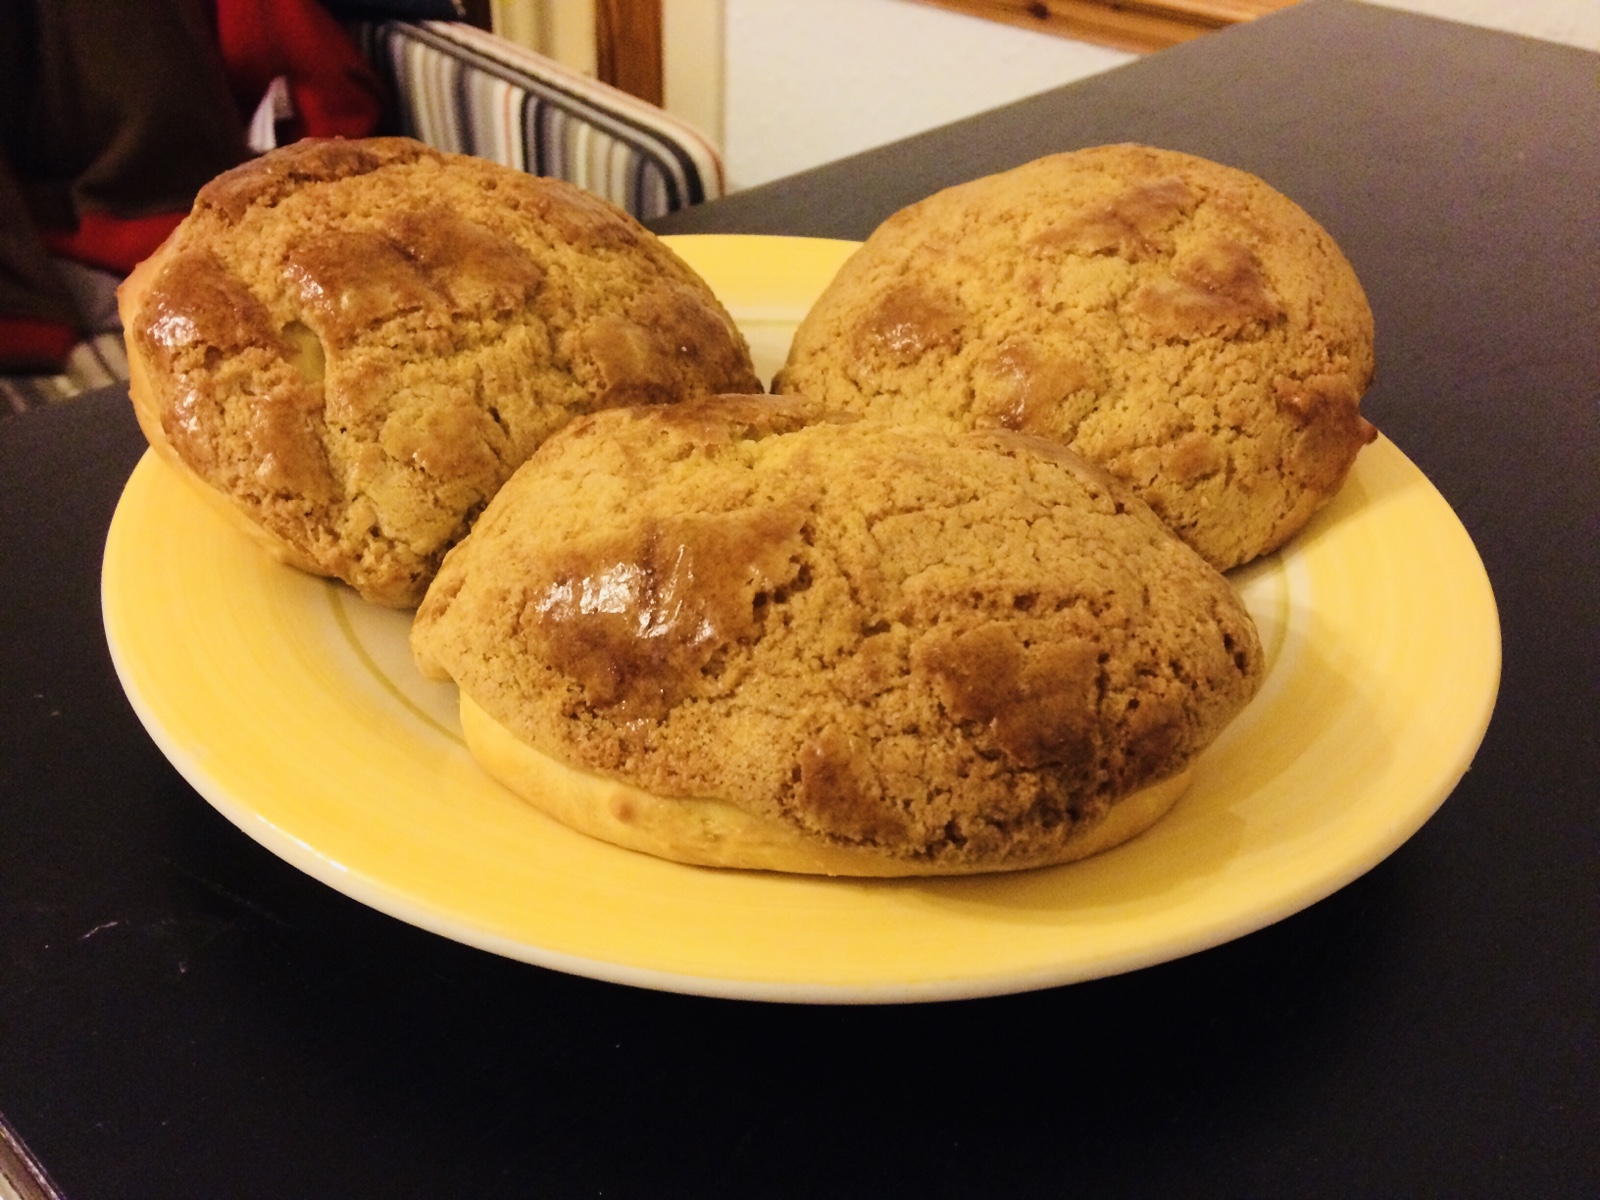
This recipe is found in ‘How To Make Bread’ by Emmanuel Hadjiandreou. (I also added some dried herbs in it to spice things up! 😉)

Ciabatta

Quantity: 2 ciabatta

Ingredients:

200g / 1½ cups white strong/bread flour

4g / ¾ tsp salt

1g / ¼ tsp dried/active dry yeast

150g / ⅔ cup warm water

50g / 3 tbsp olive oil

Method:

1. Mix the flour and salt together in a large mixing bowl.

2. Dissolve the yeast in the warm water. Add to the flour mixture.

3. Mix the mixtures together with a wooden spoon to form a fairly sticky dough.

4. Place about one third of the olive oil in a separate mixing bowl. Transfer the dough over.

5. Cover and let the dough rest for 1 hour. After the 1 hour, gently fold the dough twice and cover again.

6. Repeat step 5 for three more times. Add a little olive oil before resting each time so that the dough does not stick too much to the bottom of the bowl. By the end, the dough should be well-risen and bubbly.

7. Transfer the dough to a floured surface. Be gentle to avoid damaging the air bubbles. Divide it into two equal portions.

8. Shape the dough into a rough, slipper shape. Roll in flour and place on a baking tray lined with baking parchment.

9. Let it rest for 5-10 minutes. Meanwhile, preheat the oven to 240C/475F/Gas 9.

10. Bake for about 15 minutes, or until golden brown and it makes a hollow sound when tapped at the bottom. (You do not need a cupful of water to create steam in the oven as the ciabatta dough is moist enough to create steam on its own.) When ready, set on a wire rack to cool.

Rolling in the Deep Fryer

Do you enjoy doughnuts? 🍩🍩🍩 I always love a good doughnut, especially ones topped with chocolates! 😋 It has been one of the bakes that I gave myself a goal to make, though I kept putting it off to avoid the messiness that could come with deep frying in my small apartment. (The nightmare scenario of hot oil spluttering all over my bed! 😰😰) Therefore, this time while I am staying at my family’s home, I decided to make full use of the kitchen here to make some doughnuts.😉 (Though my mum wasn’t particularly happy with the mess I created afterwards…😅😅)

For my first time making them, I felt I did a decent job.😁 I adapted a recipe from the allrecipes UK website (Link: http://allrecipes.co.uk/recipe/4920/crispy-and-creamy-doughnuts.aspx), though I omitted the egg as I ran out of them in the kitchen and added a bit more water in place of it.😛 I made two kinds of doughnuts, one with chocolate and the other was lemon and blueberry. I did have a bit of issue with the dough being too wet and sticky, so was struggling with the shaping until I added more flour. When it came to the frying, I did a few doughnuts as testers to gauge how I should fry them and they seemed to come out better when fried with a lower heat. (No, I didn’t have a thermomter…) And I underestimated how big these doughnuts would expand as they cook, so they came out quite big. At least we were hungry lol! 😂

Have you made doughnuts before? Feel free to leave any thoughts or advices in the comments below! 😊

Childhood and Jelly

How often do you spend time reminiscing about your childhood? A few days ago, I managed to dig up my old diaries from over 10 years ago, hidden behind piles of books on my old book shelf in my family home. Reading back, I felt a wave of nostalgia. Come to think of it, so much had happened within these past 10 years with many ups and downs. Yet, I don’t feel much different from who I was back then. I always seem to have been the kind of person who strives for and wants more in life, no matter how tiring it can get. But at times I feel lost, not knowing where to go next, questioning what I am doing and feeling demotivated.

I remember when I was a child I used to get so excited over the simplest things in life. Cartoons, comics, games… But my passion in these things slowly somehow dwindled. One of the many things though that get me all hyped up back when I was a little kid was the agar jelly that my mum used to make.

Agar is a type of seaweed that can be used as a substitute for gelatine, and it is widely used in many Asian desserts. It is also suitable for vegetarians and vegans. My family often used strips of dried agar and rock sugar to make jelly as snacks since the recipe is very straightforward (see below). Most of the times we have them plain, but we also sometimes like to incorporate other things such as coconut milk into the jelly.

My mum taught me how to make them today, and the process really made me reflect about things now in my life. Why make things complicated when you can have them so simple? Perhaps simplicity really is the best policy to happiness. 🙂🙂 Do you agree? 🤗

Plain Agar Jelly

Quantity: about 30 small jellies

Ingredients:

450g water

7g dried agar strips

80g rock sugar

Method:

1. Heat the water in a saucepan to boil.

2. Add the agar and sugar to the boiling water. Continue to heat until they have fully dissolved.

3. Pour the mixture into moulds of your choosing. Place in fridge for about 15 mins, or until set. (It should set quite quickly.)

4. Remove from moulds gently.

For the coconut agar jelly, substitute about half of the water with coconut milk.

One Ice Cream a Day Keeps the Hot Weather Away

As we are now firmly in the month of August, the warm weather here in the UK might be approaching to its end (now I might just have jinxed myself with the unpredictability of British weather lol.) With the scorching hot weather, I have completely lost count with the number of ice creams I had eaten in the past months. 😛🍦🍦🍦 But, have you ever tried to make your own ice cream at home? With homemade ice creams, you are free to create any flavours you can imagine and the sky is the limit!

Ice cream is essentially a flavoured, frozen custard, and it is actually a lot more straightforward and easy to make than one may think otherwise (at least in my case lol.) All you really need is a plastic box and a freezer, alongside some stirrings to do and a bit of patience. The first flavour I made is one of my absolute favourite – mango! 😋😋 You can check out my recipe below, and it is also adaptable for other ice cream flavours!

What is your favourite ice cream flavour? 😉

Mango Ice Cream

Ingredients:

300g single cream

100g caster sugar

350g mango puree

250g double cream

1 tbsp lemon juice

Method:

  1. Heat single cream at a lot heat, the stir in sugar until it has completely dissolved.
  2. Pour the cream in a container, then add in the mango puree, double cream and lemon juice. Mix using a whisk until well-combined.
  3. Place the ice cream in the freezer for about 3 hours, or until semi-frozen. Use a fork to fold the ice cream evenly, starting from the edges.
  4. Place it back to the freezer to freeze overnight, or until it is completely frozen before serving.

As Quick As It Comes, As Quick As It Goes

To cap off the theme of bread week today, I decided to make soda bread, a variety of ‘quick bread’ that does not require yeast or the time-consuming rising process. For this Parma ham, mozzarella and cheddar soda bread, I also served it with my homemade tomato and basil sauce. (This sauce is one of a few things that my mum never criticised whenever I make it lol!😂) Indulging, rich, and almost tastes just like a giant pizza, this is one that would be enjoyed by any cheese-lovers out there!😋

The recipe was adapted from the plain soda bread recipe from ‘How To Make Bread’ by Emmanuel Hadjiandreou.

Parma Ham, Mozzarella and Cheddar Soda Bread with Tomato and Basil Sauce

Quantity: 1 Bread

Ingredients:

For the bread:

250g strong white/bread flour

1 tsp salt

1 tsp bicarbonate of soda

125g mozzarella, diced

50g Parma ham, torn

60g cheddar, shaved

260g whole milk/buttermilk

For the sauce:

4 tomatoes, diced

2 tbsp ketchup

2 tsp dried/fresh chopped basil

A pinch of salt

1 tbsp olive oil

Method:

  1. Preheat the oven to 200C/400F/Gas 6.
  2. In a large mixing bowl, mix the flour, salt and bicarbonate of soda together.
  3. Add the mozzarella, ham and cheddar to the flour mixture, saving a small portion of the ham and cheddar for decoration on top.
  4. Pour the milk into the mixture and mix until it just comes together.
  5. Line a baking tray with baking parchment. Transfer the dough over to the baking tray, shape the dough into a ball and flatten slightly.
  6. Slash a deep cross over the bread using a sharp knife. Place the remaining Parma ham and cheddar cheese over the cross.
  7. Bake for 50-60 mins, or until golden and baked through completely. To check, tap the bottom of the bread, it should sound hollow. If you notice the top of the bread is browning too quickly during baking, place a piece of foil over it.
  8. While waiting for the bread to finish baking, preparing the sauce by cooking the tomatoes in a pan. Add the ketchup and basil, and season with salt accordingly. Put the sauce through a blender to create the smooth sauce. Finish with olive oil.
  9. Once the bread is ready, set on a wire rack to cool briefly. Serve the bread with the sauce while they are still warm.

Once Upon A Pineapple

On this Throwback Thursday and continuing the theme of bread week, I would like to talk about a very memorable bread from my childhood called Bolo Bao, literally translated from Chinese as ‘Pineapple Bun’.

My homemade Bolo Bao

Bolo Bao is a sweet bun originated from Hong Kong. It is an extremely popular treat there (being apparently named as a cultural heritage in 2014), and many people including those in my family enjoy it so much to the point that it is consumed almost every other day. There are many bakeries and eateries in Hong Kong that specialise in this bread, and my mum used to regularly go to a particular eatery to get fresh Bolo Bao that had come straight out of the oven during her work days.😋 Now, just to clarify that despite its name, it has absolutely no pineapple in it! What it does have is the signature sweet, crunchy pastry on the top, which to me resembles a craquelin on a choux bun and tastes like a sugar cookie. And, this crust is the very thing that leads to its name due to its pineapple-like texture and appearance. 🍍🍍 😂

A few years, I tried to make this bread at home and actually turned out to be quite successful with it.😊 The dough is an enriched dough but otherwise the rest of the procedure is fairly straightforward including the crust.

Bolo Bao (‘Pineapple Bun’)

Quantity: 16 buns

Ingredients:

For the dough:

450g strong white/bread flour

60g unsalted butter

110g caster sugar

225g milk

2 tsp yeast

1 large egg, beaten

For the pastry crust:

200g plain flour

60g unsalted butter

60g lard

110g caster sugar

½ tsp bicarbonate of soda

½ tsp baking powder

1 large egg yolk

3 tbsp milk

1 tsp vanilla extract

  1. To prepare the dough, rub the butter into the flour until it resembles fine breadcrumbs in a large mixing bowl. Mix in the sugar.
  2. In a separate bowl, dissolve the yeast in the warm milk. Add the beaten egg to the yeast solution and mix.
  3. Pour the yeast mixture into the flour mixture. Use a wooden spoon and then your hands to bring the mixtures together. Knead for about 10 minutes to form a smooth dough. (The dough will be quite wet but try not to be tempted to add more flour.)
  4. Cover and allow it to rise for 1-2 hours, or until it has doubled in size.
  5. Knock the air out of the dough and transfer it to a lightly floured work surface. Knead again for 2 minutes.
  6. Divide the dough into equal portions and place on a baking tray lined with baking parchment. Leave the dough to rise for about 20-30 minutes.
  7. While waiting for the bread dough to finish its second rise, get the crust ready by starting with rubbing the butter and lard into the plain flour. Mix in the sugar, bicarbonate of soda and baking powder.
  8. In a separate small bowl, mix the yolk, milk and vanilla extract together. Add it to the flour mixture and mix with your hands to bring the mixtures together to form a smooth dough.
  9. Transfer the dough for the crust to a lightly floured work surface. Divide the dough to equal portions and roll them into balls between your hands. Dust the balls with a small amount of flour and, using a rolling pin, roll them out into even, thin circles.
  10. Preheat the oven to 180C/350F/Gas 4. Place a baking tray with a cupful of water at the bottom of the oven to create steam.
  11. Place the crust on top of the buns and brush with an egg wash.
  12. Bake for about 15-20 minutes, or until golden. Then, leaving on a wire rack to cool slightly before serving.

Do you have any memorable bakes from your childhood that speak about your culture? Let’s share in the comments below! 😊

The Family Cooking Show

My love for food was definitely stemmed from my family, and they were the ones who first got me into the kitchen. My mum especially was the one who taught me the basis of cooking, and I learnt my first bake from her (which was a Swiss roll). Nowadays, whenever I go back to my family home in Scotland, I always enjoy spending time in my old kitchen and baking (especially seeing how the one in my apartment is tiny!)

It was a very rainy day outside today with lightning and thunder (typical Scottish weather lol), which made it a perfect stay-at-home day for more baking.😉 My mum is my biggest critic, but every now and then we will work together in the kitchen despite the potential bickers.😅 While I am the stronger baker, my mum has always been the stronger cook. So, we worked to our strengths to create some stuffed pita breads with me making the bread and my mum in charge of the fillings.😋

My mum prepared the filling by marinating some beef shoulder and then stir-frying them quickly in the pan, and finished with some toasted sesame seeds. In addition, she prepared a lettuce and red-onion salad. And they were delicious when stuffed into the pocket of the crispy pita bread. 🤤🤤 It was a match made in heaven!

The recipe for my pita bread can be seen below, which was found (yet again 😂) from the recipe in ‘How To Make Bread’ by Emmanuel Hadjiandreou. (Honestly, I will say again if you’re interested in bread making, get this book!)

Pita Breads

Quantity: 6 pita breads

Ingredients:

200g / 1⅔ cups plain/all-purpose flour

4g / ¾ tsp salt

1g / ¼ tsp dried/active dry yeast

120g / ½ cup warm water

Method:

1. Mix the flour and salt together in a mixing bowl.

2. In a separate bowl, add the warm water to the yeast and stir until the yeast has dissolved.

3. Add the yeast solution to the flour mixture. Mix using a wooden spoon and your hands until they come together to form a dough.

4. Cover the dough and let it stand for 10 minutes.

5. After the 10 minutes, knead gently by pulling a portion of the dough up from the side and pressing it into the middle. Repeat another 8 times and the dough should start to resist. Afterwards, cover again and let it stand for another 10 minutes.

6. Repeat step 5 twice.

7. Knead the dough for the last time. Then, cover and let rise for 1 hour, or until it has doubled in size.

8. Punch down the dough to knock out the air and place it on a lightly floured work surface.

9. Divide the dough into equal portions and roll each between your hands to make individual balls.

10. Cover and let it rest for 10 minutes.

11. While waiting, preheat the oven to 240C/475F/Gas 9 and place a baking tray or a roasting pan inside to preheat.

12. After the 10 minutes, use a rolling pin to roll out each ball. Cover again and let it rise for 10 minutes.

13. Dust the pita breads with flour and place on the preheated roasting pan in the oven.

14. Bake until completely puffed up. The cook time will vary, but it should be around 5-10 minutes. Afterwards, cool briefly on wire rack and then serve.

Do you have any stories and interesting cooking with your family? Feel free to let me know in the comments below!😉

Another Day of Loafing About

As I continued to browse through ‘How To Make Bread’ by Emmanuel Hadjiandreou (which had since become my bible of bread making lol), I stumbled across a recipe for some deliciously looking Armenian flatbreads and decided to give it a try today. 😋 Now, I will be honest in telling you that I had absolutely no idea what this bread was, nor had I heard of it until now. Upon a brief Google search, it seemed to be that this bread is also called Ormiańskie podpłomyk. (Feel free to correct me lol! I would love to learn more about it haha!)

The flatbreads themselves were very thin and crispy, and felt quite like filo pastry. According to the book and what I managed to find online, it appeared that these flatbreads were usually (and I guessed traditionally) topped with only red onions and seeds, but I decided to go a bit more creative about it and give it more colours!😝 (Think Armenia might not be happy with me now lol…) The crispness of the bread paired extremely well with the crunchiness of the toppings. I personally couldn’t stop eating it! 🤤 I think these are perfect as party treats or as light, healthy snacks. 👍 Also, this bread does not need any yeast and is suitable for vegetarians and vegans, so let’s all give it a try!

This recipe is adapted from the Armenian flatbreads recipe found in ‘How To Make Bread’ by Emmanuel Hadjiandreou.

Tango’s Armenian Flatbreads

Quantity: About 24 flatbreads, 4 trays

Ingredients:

For the dough:

160g / 1¼ cups strong white/bread flour

5g / 1 tsp salt

50g / 3 tbsp olive oil

75g / ⅓ cup water

Garlic-infused olive oil, for brushing

For the toppings:

Red onion, sliced thinly

Spring onion, chopped finely

Sesame seeds

Dried basil

Method:

  1. Mix the flour and salt together in a mixing bowl.
  2. In a separate bowl, mix the olive oil and water together, then add it to the flour mixture. Mix until it comes together.
  3. Cover the dough and let it stand for 5 minutes.
  4. After the 5 minutes, knead the dough by pulling a portion of it up from the side and press it into the middle. Repeat another 8 times and the dough should start to resist. Cover the dough again and let it stand for another 5 minutes.
  5. Repeat step 4 twice.
  6. Knead the dough for one last time. It should be smooth and elastic. Then, cover the dough and let rise for 30 minutes.
  7. Divide the dough into 4 equal portions. Place one portion of the dough onto a baking tray lined with baking parchment.
  8. Using your hand or a rolling pin, flatten the dough and stretch it out from each corner until you get a very thin. rough rectangle. Repeat with the remaining portions of the dough.
  9. Let it rest for 15 minutes. Meanwhile, preheat the oven to 180C/350F/Gas 4.
  10. Once the dough has rested, brush the garlic-infused olive oil all over the flatbreads.
  11. Cut each flatbread into 6 using a sharp knife.
  12. Sprinkle the toppings evenly over the flatbreads.
  13. Bake the flatbreads for 5-10 minutes, or golden-brown and crispy. When ready, cool on a wire rack.

Who Doesn’t Like A Good Ol’ Brioche?

For someone who is not hugely big on bread, I love brioche! ❤️❤️ Its fluffy and soft texture makes it my favourite bread to eat, and I am sure that it is also one of many people’s favourites. Whether as a classic burger bun or as a glorious ice cream sandwich, there would certainly be something that tickles your fancy.

Brioche is an enriched dough with eggs and butter, so it does take more time than normal white bread as it takes longer to rise as a result. But trust me when I say that it is definitely worth the effort! 😋 This recipe that I used is very straightforward and remember just a bit of patience is key! 😉

(Psssst I actually think I might have been too patient this time and over-proofed mine… 😅)

This recipe is inspired by the brioche recipe found in ‘How to Make Bread‘ by Emmanuel Hadjiandreou.

Brioche Loaf

Quantity: 1 loaf

Ingredients:

10g / 1 tbsp fried/active yeast

60g / ¼ cup whole milk, slightly warmed

250g / 2 cups strong white/bread flour

30g / 2½ tbsp caster sugar

4g / ¾ tsp salt

2 medium eggs

100g / 6½ tbsp unsalted butter, softened

Method:

1. In a mixing bowl, add the yeast to the warm milk and stir until it is fully dissolved.

2. Mix the flour, sugar and salt in a separate bowl.

3. Beat the eggs together and add it to the yeast solution. Mix and then add the yeast solution to the flour mixture.

4. Using your hands, mix the mixtures together until they come together to form a wet, sticky dough.

5. Cover and let the dough rest for 10 minutes.

6. After the 10 minutes, knead the dough by pulling a portion of it up from the side and pressing it into the middle. Repeat another eight times, and the dough should start to resist. (This kneading process should not take longer than around 10 seconds.) Cover the dough and let it rise for another 10 minutes.

7. Repeat step 6 one more time.

8. Cut the butter up into small species and push it into the dough.

9. Knead the dough to start incorporating the butter. Cover and let it rise for another 10 minutes.

10. Knead the dough again for the last time, ensuring all the butter is fully incorporated.

11. Cover and let it rise for 1 hour, or until the dough is doubled in size.

12. While waiting, prepare the loaf tin by greasing it with butter.

13. Knock the air out of the dough and transfer it onto a floured work surface.

14. Divide the dough into three equal portions and roll them between your hands to form perfectly round, smooth balls.

15. Place the dough balls across the prepared loaf tin. Cover and let it rise to double in size, which will take around 30-45 minutes.

16. While waiting for the dough to finish proofing, preheat the oven to 200C/400F/Gas 6.

17. Beat an egg with a pinch of salt. Once the dough has finished rising, brush the egg wash all over it. Snip the top of each bump with scissors.

18. Place a cupful of water at the bottom of the oven to create steam. Bake the dough for about 20 minutes, or until golden brown and the loaf makes a hollow sound when tap at the bottom. Cool on a wire rack when ready.